Posted on

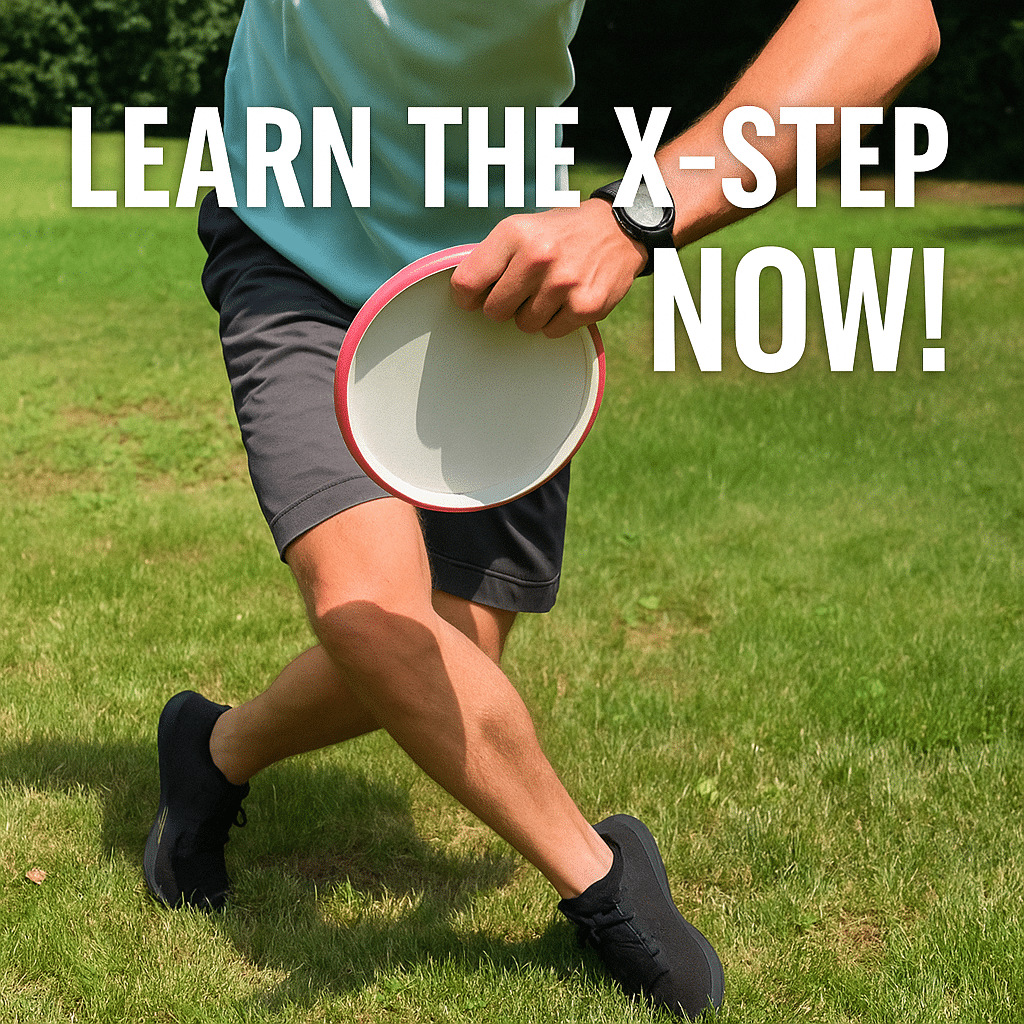
Learn The X-Step NOW!

disc golf x-step No ratings yet.

Improving your backhand distance in disc golf isn’t just about arm speed. The real secret comes from using your lower body. With the right footwork, you can engage your hips and legs, generate more momentum, and add serious power to your throws. One of the most effective ways to do this is by learning the X-Step.

What Is the X-Step?

The X-Step is a controlled three-step run-up used on backhand drives. Instead of relying on a full sprint or a rushed approach, the X-Step lets you build power while staying balanced and accurate. It’s the foundation of most professional players’ driving form.

How the X-Step Works

  • For right-handed players: step first with your right foot, then bring your left foot behind your right (forming the “X”), and finish with another step on your right foot.
  • For left-handed players: reverse the sequence.

This sequence puts your body in a strong position for a full reach-back and a powerful release.

Step-by-Step Breakdown of the X-Step

1. Set Up and Aim

Line up your body so that your throwing shoulder points toward the target. Extend your arm with the disc to lock in your line. Remember, your “target” isn’t always the basket—it could be an aiming point for a hyzer, anhyzer, or line around an obstacle.

2. First Step with Your Dominant Foot

Take your first step with your throwing-side foot (right foot for right-handed players). Keep your upper body moving along a straight line toward your target while placing this step slightly forward of that line.

3. Cross Step with Your Non-Dominant Foot

Bring your non-dominant foot behind your lead foot, creating the “X” position. This is where your reach-back begins—pull the disc straight back while your head and shoulders turn away from the target.

4. Final Step with Your Dominant Foot

Plant your dominant foot firmly. Your reach-back should now be fully extended, ready to explode into the throw. Drive your elbow forward and pull the disc along a straight line toward your target as your hips and shoulders rotate.

5. Release and Follow Through

Let your momentum carry through the release. Your throwing arm should swing across your body, and your trailing leg should pivot around. This follow-through prevents injury and ensures that all of your generated force transfers into the disc.

Tips for Transitioning to the X-Step

If you’ve been throwing from a standstill, the X-Step may feel awkward at first. Here’s a simple way to build up:

  • Start with a one-step throw – Take a single lead step with your dominant foot and work on timing your reach-back and release.
  • Slow it down – Practice the X-Step at walking speed before adding speed. Balance and accuracy matter more than rushing.
  • Reset if needed – If you lose balance, stop and start over. Clean, consistent form builds muscle memory.

Still Struggling?

Form changes take time. If you’re still having trouble, check out this instructional video by Danny Lindahl of Dynamic Discs. His slow-motion breakdown makes it easy to see how each step works together.

Recommended Gear for Practicing the X-Step

When learning new footwork, it helps to practice with discs that are forgiving and easy to control:

A reliable midrange like Discraft Buzzz holds your release angle, making it great for form work.

Buzzz

Putters – Putters like the Innova Aviar are perfect for controlled drives when dialing in footwork.

Discmania Fairway Drivers – Stable, easy-to-throw drivers help you test the X-Step without overpowering your form.

Final Thoughts

The X-Step is one of the most important techniques in disc golf. It builds a strong foundation for distance, control, and consistency. Take your time, practice slowly, and you’ll notice your throws traveling farther with less effort.

If you’re just starting out, you may also enjoy our guide on the best discs for beginner disc golfers.

Review This Disc

Posted on

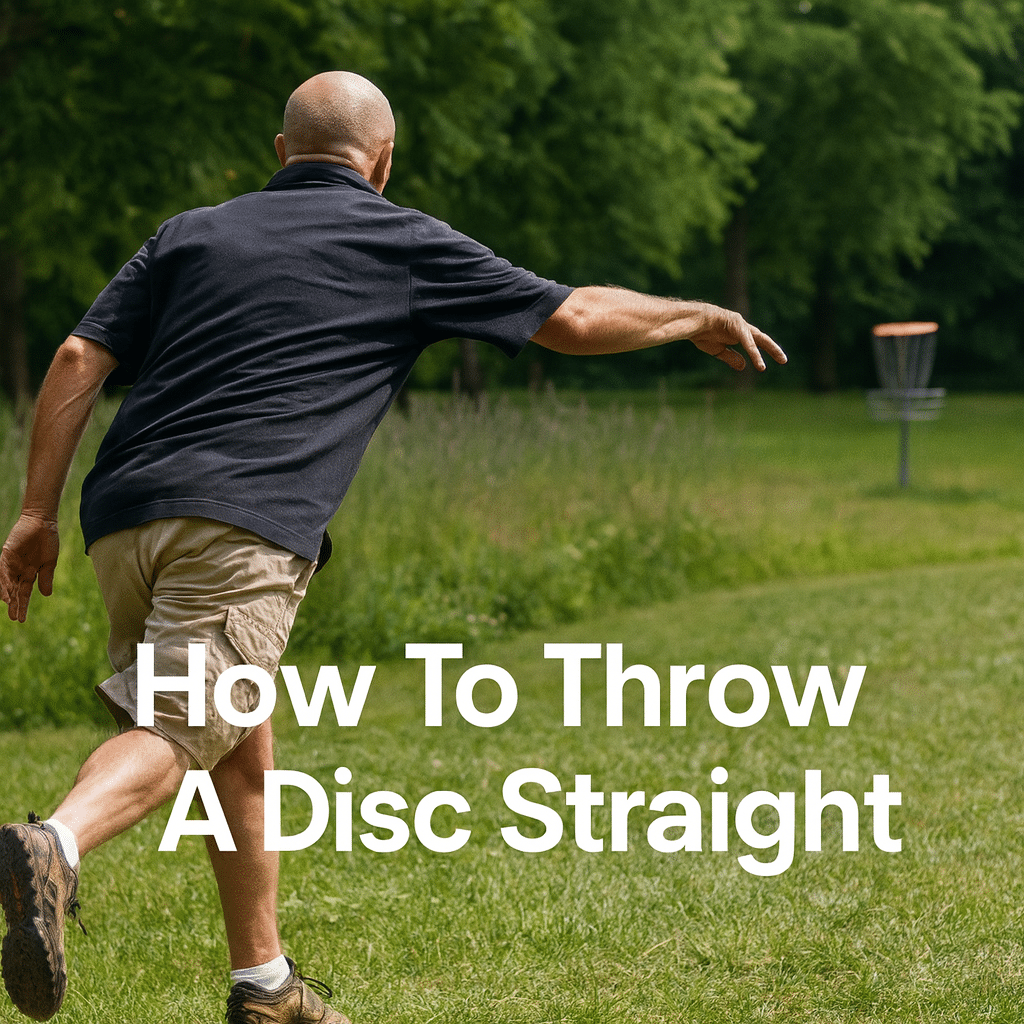
How To Throw A Disc Straight: 2 Methods For Achieving That Super Straight Flight Path

how to throw a disc straight 4/5 (1)

There’s nothing quite like standing on the tee pad, staring down a narrow tunnel, and knowing you need a perfectly straight drive to stay in bounds. Whether you’re threading trees or aiming for a tight gap, learning how to throw a disc straight can make or break your round.

In this guide, we’ll cover two main techniques to get your disc flying dead straight—plus a few bonus tips on disc selection and form tweaks that can make a big difference.

Want Some Tips On How To Throw Straight? – Sabattus Disc Golf, Inc.

The Two Ways to Throw a Disc Golf Disc Straight

  • Throw a stable disc with a flat release
  • Throw an understable disc with a hyzer angle (a hyzer flip)

Both methods can work wonders depending on your form, arm speed, and disc selection. Let’s break them down.

Option 1: Use a Stable Disc With a Flat Release

To keep things simple, let’s define a stable disc as one that naturally flies straight when thrown flat. That usually means a Turn rating of 0 to -1, which is the third number in the disc’s flight rating (e.g., 7 / 5 / 0 / 1).

Here are a few great stable discs that work well for straight flights:

EMac Truth

TL

Buzzz

Throw these with a flat release angle and a smooth, straight pull across your chest. If you’re throwing backhand, keep your shoulders square and your wrist neutral. Avoid any upward or downward swoop in your reach-back or follow-through—that’s what causes hyzer or anhyzer angles when you don’t want them.

Quick tips:

  • Keep your pull-through level: Start and end at the same height.
  • Stay square to your target: Especially important for backhand form.
  • Minimize wrist roll: Rounding can ruin an otherwise clean throw.

Option 2: Throw an Understable Disc With a Hyzer Angle (Hyzer Flip)

This method is a bit more technical but super effective once you dial it in. The hyzer flip involves using an understable disc (Turn rating -2 or lower) and releasing it on a hyzer angle. The disc will naturally flip up to flat and ride a straight path.

Ideal discs for a hyzer flip include:

Underworld

Leopard

Meteor

Throw the disc on a slight hyzer angle (edge down) with a powerful, clean snap. The disc should flip up to flat mid-flight and glide forward in a straight line. You may need to experiment with how much hyzer angle you give it—more angle for flippier discs, less angle for neutral ones.

Pro tips:

  • Release low and fast: Gives the disc time to flip without fading early.
  • Snap is everything: Hyzer flips need clean energy to fly correctly.
  • Test your plastic: Some plastics like GStar or ESP FLX flip easier than stiff ones.

Pay Attention to Fade

Even if you nail a straight line, fade can ruin your approach. Fade is the disc’s natural tendency to hook at the end of its flight—usually back to the left for a right-hand backhand (RHBH) throw.

Fade is the fourth number in a disc’s flight rating. If you want your disc to finish straight, look for a Fade rating of 0 or 1.

Putters like the Latitude 64 Dagger or Discraft Challenger SS often have minimal fade and hold a line beautifully.

Bonus tip: Releasing the disc low can reduce the time it has to fade. So if you’re stuck with a disc that tends to hook at the end, throw it low and flat to minimize that finishing movement.

Practice These Methods Before Hitting the Course

Before you try to carve a laser beam through a tree-lined fairway, hit the practice field. Work on both the flat release and hyzer flip methods, and pay attention to how your form affects the disc’s behavior. Bring a few different discs and see what works best for your arm speed and release style.

With repetition, muscle memory will take over—and those tunnel shots won’t feel nearly as stressful.

Recommended Disc Categories to Explore:

Final Thoughts

Throwing a disc straight is one of the most useful—but trickiest—skills in disc golf. Whether you choose the flat release method with a stable disc or the hyzer flip with an understable flyer, you’ll need to experiment and practice to find what works best for you.

Don’t rush it. Work through your form, try different molds, and remember—even the pros didn’t learn to hit tunnels overnight.

Review This Disc

Posted on

How To Throw An Understable Disc

how to throw an understable disc No ratings yet.

Understable discs don’t always get the credit they deserve. Overstable drivers and utility discs usually get all the attention—probably because pros often rely on them. But if you aren’t throwing understable discs, you’re missing out on some of the most versatile and useful shots in the game. In this guide, I’ll break down what “understable” really means, how release angle affects flight, and the specific shots where these discs shine.

What Does Understable Mean?

When a disc is called understable, it’s about the disc’s turn rating. For a right-handed backhand thrower, an understable disc will naturally drift to the right after leaving the hand. That’s why you’ll often hear these discs called “flippy.” They have a stronger tendency to turn over compared to neutral or overstable discs.

How Release Angle Affects Understable Discs

The flight of an understable disc depends heavily on how you release it. There are three main release angles—flat, hyzer, and anhyzer—that will completely change the flight path.

Flat Release

Thrown flat, an understable disc usually turns right, then fades back left as it slows down. This creates the classic S-curve flight that can cover long distances with less effort.

Hyzer Release

On a hyzer angle, an understable disc tends to flip up flat and glide straight before fading slightly left. This is known as a hyzer flip—a shot many players rely on for controlled distance.

Anhyzer Release

Released on an anhyzer angle, understable discs will turn more aggressively to the right. Depending on speed and fade, the disc might hold that angle all the way down, creating a turnover shot. With enough angle and speed, the disc can even cut into the ground and keep rolling—this is called a roller.

Shot Types You Can Throw with Understable Discs

  • Hyzer Flip – A reliable way to achieve straight distance drives.
  • Roller – Turn the disc fully over and let it roll down the fairway.
  • Turnover – Great for shaping shots around obstacles.
  • S-Curve – Combine right turn and late fade for extra distance.

Mastering these shots with an understable disc gives you more options to attack different fairways and recover from tricky lies.

When to Throw Understable Discs

  • Beginners – Slower arms get straighter flights and more distance.
  • Tailwinds – Since tailwinds make discs act more stable, understable plastic balances it out.
  • Lower Power Throws – Perfect for controlled shots when you don’t need maximum arm speed.

If you try to throw a very overstable disc with less power, it will hyzer out early. Switching to an understable disc makes the flight much easier to control.

Recommended Understable Discs

If you want to try out some understable discs, here are a few excellent choices:

Buzzz

Leopard

Roadrunner

Diamond

For more options, check out our full selection of understable discs.

Review This Disc

Posted on

Quick Guide : The Flex Shot

flex shot guide No ratings yet.

If you’re an intermediate or advanced disc golfer looking to expand your shot selection, learning the flex shot can make a big difference. It’s a versatile throw that helps with shaping lines and even adding distance when executed correctly. Beginners may want to wait before focusing on this shot, but it’s still useful to understand how it works.

What Is a Flex Shot?

The disc golf flex shot is thrown by releasing an overstable disc on an anhyzer angle. The disc turns out of your hand, then “flexes” back as its stability kicks in. For a right-handed backhand thrower, the disc will first drift right before working back left.

Some players call this the “anhyzer flex shot,” but most simply use “flex shot.”

How to Throw It

  • Choose an overstable driver or fairway.
  • Release on an anhyzer angle so the disc turns out of your hand before fighting back.
  • Keep the nose down to prevent stalling or early drops.
  • Adjust the height—higher throws allow more distance and fade, while lower throws give tighter lines.
  • Trust the disc’s stability to bring it back.

Tips for a Successful Flex Shot

  • Pick a disc with medium to high fade for a stronger finish. For example, the Infinite Discs Emperor or Innova Destroyer are common flex shot choices.
  • Generate plenty of snap and power so the disc carries before fading back.
  • Avoid too much anhyzer, which can cause cut rolls.
  • Devote field practice sessions specifically to dialing in this throw.

When to Use the Flex Shot

Shot Shaping

The flex shot is perfect when you need to bend around multiple obstacles—turning one way early, then fading back. Players who often face wooded fairways will benefit from having this shot in the bag.

Extra Distance

Adding a slight anhyzer release to an overstable driver can keep it in the air longer than a flat release. This gives you added carry before the disc’s fade brings it back.

Flex Shot vs. S-Shot

Many players confuse the flex shot with the S-shot, but there’s an important difference:

  • Flex Shot: Overstable disc released on an anhyzer angle. More advanced, consistent, and reliable once mastered.
  • S-Shot: Understable disc released flat. Easier for beginners, a simple way to add distance, but less predictable.

The two shots often look the same from above, both carving an “S” shape in the air, but the mechanics and discs used are different.

Final Thoughts

The flex shot isn’t the easiest throw to learn, but it’s worth the effort if you want to expand your game. It helps in wooded courses, provides new shot shapes, and can even add distance to your drives. Take the time to practice, and you’ll soon find yourself reaching for it with confidence.

Looking for discs to start practicing flex shots? Check out our selection of distance drivers and fairway drivers that can handle the stability required for this shot.

Review This Disc

Posted on

How To Become A Professional Disc Golfer

how to become a professional disc golfer No ratings yet.

Every disc golfer has probably dreamed—at least once—of going pro. Turning a passion into a profession is exciting, but it takes more than just talent and love for the game. If you’re serious about joining the ranks of sponsored touring pros, here are some practical, honest tips to help you move in that direction.

Practice Like a Professional

Free Disc Golf Frisbee Golf photo and picture

The biggest difference between casual and professional players? Intentional practice.

Playing rounds with your friends is fun—and yes, it helps—but it’s not the same as targeted training. To truly elevate your game, focus your efforts on individual skill areas:

  • Putting: Build a repeatable routine and practice from inside and outside the circle.
  • Driving: Work on accuracy, distance, and angle control—especially on different release angles like hyzer, anhyzer, and flat.
  • Scrambling: Set up awkward lies and learn how to save par under pressure.
  • Approach shots: Practice controlled upshots with your favorite approach discs.

A dedicated practice routine is essential. Track your progress and push for small improvements each week.

Train Like an Athlete

Disc golf at the professional level is physically demanding. Courses are long. Rounds can stretch over multiple days. Elevation, wind, and weather all play a role. That’s why building a strength and conditioning routine matters.

You don’t need to become a bodybuilder. Focus on:

  • Core strength for balance and rotational power.
  • Mobility and flexibility for smoother form and reduced injury risk.
  • Cardio and stamina for long rounds and multi-day tournaments.

Pro tip: Avery Jenkins has a solid training breakdown that covers disc golf-specific exercises.

Know the PDGA Rules—Inside and Out

Playing well is important. But knowing the rules is just as critical—especially in tournament settings.

Here’s why:

  • Understanding the PDGA rulebook helps you avoid unnecessary penalty strokes (e.g., foot faults, time violations, miscalculated scorecards).
  • Knowing the rules allows you to advocate for yourself and others on the card when infractions occur.

If you’re trying to make the jump to pro, be a student of the game. Read the rulebook and keep up with annual rule changes.

Find a Coach or Mentor

You can only get so far by analyzing your own form. A good coach—or even just a higher-rated local player—can identify weaknesses in your game that you may not notice.

Consider:

  • Attending a clinic taught by a sponsored pro
  • Asking an experienced local player to watch your form or film a round
  • Finding a certified disc golf coach (some offer online lessons too)

Even one coaching session can save you months of trial and error.

Start Playing Tournaments—Then Hit the Road

If you’re not playing in tournaments yet, now’s the time. Search for local C-Tiers on DiscGolfScene.com and get started.

Once you’re comfortable competing, consider traveling to A-Tiers, PDGA Silver events, or even Pro Tour Qualifiers. Going on tour without a sponsor can be intimidating—but it’s how many current touring pros got started.

Tournament play will:

  • Expose you to tougher courses and stronger competition
  • Help you build your PDGA rating and tournament resume
  • Put you on the radar for sponsors, media, and other players

Even if you don’t win right away, the experience and exposure are invaluable.

Market Yourself

Playing well is key—but being marketable can open doors faster. Disc manufacturers and brands want players who not only perform, but also promote their gear and represent the sport professionally.

Here are a few ways to build your brand:

  • Create a YouTube channel documenting your tournament rounds or practice sessions
  • Start a disc golf Instagram or TikTok focused on tips, reviews, or vlogs
  • Collaborate with smaller brands to build experience with partnerships

Brands like Discraft, Innova, and Doomsday Discs often look for more than just PDGA ratings—they want players who help grow their visibility.

Final Thoughts

Going pro in disc golf takes time, discipline, and a real love for the grind. Every touring player started as a beginner. What separates those who make it from those who don’t is consistent effort and smart preparation.

If you build the right routines, play the right events, and promote yourself professionally, you’ll put yourself in a great position to take that next step.

Review This Disc

Posted on

How To Throw A Hyzer Flip

No ratings yet.

Learn How To Throw A Hyzer Flip! Check This Out!

So you’re new to disc golf and have heard of a shot called the hyzer flip but you aren’t sure what it is? Or maybe you have a good idea about what a hyzer flip is but you aren’t sure how to throw it? If you fit into one of these scenarios, you’ve come to the right place. In this article, we’re going to talk about how to throw a hyzer flip.

We’ll also go over some tips for improving the hyzer flip and how to select a disc for this shot. Hopefully, by the time you’ve read this article, you’ll have a great disc golf throw in your arsenal. Let’s get into it.

How To Throw A Hyzer Flip


Please note we’re supported by our readers. When you buy through our links we earn an affiliate commission. Thanks for your support!

What Is A Hyzer Flip?

The hyzer flip is a great way to get an understable disc to fly straight. It works by releasing an understable disc on a hyzer angle with a lot of force. When done right the disc will turn right (for a right-handed player) and flip to flat. The disc should continue flying parallel to the ground in a very straight flight path. It’s a great alternative to throwing a stable disc with a flat release and works well for low tunnel shots or other situations that require a straight flight path.

What Is Hyzer?

So the Hyzer part of the hyzer flip is the way the disc is released but what exactly does Hyzer mean? In disc golf, when we say, Hyzer, we mean releasing the disc on an angle with the side of the disc that is opposite your hand is tilted down. So for a hyzer release during a backhanded throw by a right-handed player the left side of the disc is tilted downward.  

What Is Understable?

The flip part of the hyzer flip refers to throwing an understable disc and getting it to flip over. You may have heard players talking about throwing a flippy disc. When they use this term they referring to an understable disc. Flippy meaning that the disc is easy to flip or turn over.

If you are unsure if a disc is understable or not, a great way to tell is by the turn rating. In the flight rating system, there are 4 numbers and 3rd number in the sequence is the turn rating. This number measures the tendency of the disc to turn left or right when leaving a players hand. A disc is considered understable if it has a turn rating between -1 and -4.  

Putting It All Together

So to throw a hyzer flip you’ll need to select an understable disc, usually a driver. You’ll use your normal driving motion but you’ll need to make sure you release the disc with a hyzer angle. The amount of hyzer you put on the disc will be a judgment call you’ll have to make and you’ll get better at making this call with practice.

You’ll want to make sure you release the disc with enough force to get it to hyzer up and flip to flat. You’ll also want to make sure you aren’t releasing the disc too high or with the noise up. When done correctly the disc should flip to flat and fly straight. You may also see the disc flip to flat, then turn over a little bit and come back. Think of a tighter S-cure.    

Hyzer Flip Tips

The Hyzer flip can be a tough shot to develop and be consistent with but it’s worth learning. There are a lot of moving parts and specific steps to get right in order to be successful. Use this tips to iron out your hyzer flip:

  • Use an understable disc
  • Release at a Hyzer Angle
  • Focus on releasing the disc with a forceful snap
  • Keep the nose down
  • Release the disc low

The Best Type Of Discs For Hyzer Flips

As we’ve already touched on, you’ll want to use an understable disc when attempting a hyzer flip. A driver is preferred but it’s also possible to hyzer flip a midrange or putter, it just has more force. A new disc that has a negative turn rating works great for a hyzer flip. You can also use an older beat-in disc that you know is flippy.

Check out this article I wrote on the best hyzer flip discs.

When To Use The Hyzer Flip

We’re already talked about using the hyzer flip for tunnel shots but this is a great shot to use in the woods or to hit a specific gap. The main thing you will need to think about when trying to make a judgment on if a hyzer flip will work for you is the distance it takes the disc to flip to flat. If you are staring down a tunnel or a close group of tree you’ll need to make sure you have enough distance for the disc to hyzer to flat before it would come in contact with an obstacle.

A situation you probably wouldn’t want to use a Hyzer flip is an open field. You will probably be better off not putting some much snap on an understable disc to get it hyzer flat and use another shot where less force is required.

The Hyzer Flip In Action

Check out this video to see disc golf pro, Eric Oakley perform a hyzer flip. He gives his own tips and disc recommendations.

Image Credit Flickr Creative Commons – Bureau of Land Management Oregon and Washington

Review This Disc

Posted on

Disc Golf Push Putting

No ratings yet.

Push Putting: A Great Disc Golf Putting Option

You’ve probably heard me say this before but here goes, putting is the most important part of your disc golf game. Let that sink in. THE MOST IMPORTANT part of your disc golf game. How you get your disc into the basket inside the circle can make or break a hole but more importantly, it can make or break a round. The key here is consistency. Meaning a repeatable movement that gives you a consistent result. As a disc golfer, if you want to see lower scores on a regular basis you need a consistent putt and it can be argued that the most consistent putting style is disc golf push putting.

Disc Golf Push Putting


Please note we’re supported by our readers. When you buy through our links we earn an affiliate commission. Thanks for your support!

So What Is Disc Golf Push Putting?

You can think of pushing putting as pitching the disc at the basket.

A push putt is normally done by taking the disc with a straight wrist and bending at the waist. As your body moves forward toward the basket, you release the putter straight at the basket with a slight nose up.

The idea being, there isn’t any side to side motion, like with a spin putt. In a spin putt, you have to curl your wrist to achieve the spinning motion. In doing so, your hand moves side to side. This can generate power but you have to get your release point down perfectly.

With a push putt, there isn’t any side to side motion or timing your release in this way. You are just pointing and shooting. There will be more on why this is so important later.

How To Perform A Disc Golf Push Putt

  • Line your feet up where they form a straight line toward the basket.
  • Your dominate food will be in front.
  • You build momentum by bending at the waist and drawing the disc toward your middle.
  • To throw the putt, you will push the disc away from your middle in a straight line toward the basket.
  • You should be pushing off with your back foot to generate power.
  • Keep your wrist straight all the way through the movement.
  • Release the putt with a slight nose up.

If you need a visual, David Feldberg does a great job of teaching the push putt in this video.

Benefits Of Push Putting

The ultimate benefit of the push putt is its consistency.

There aren’t as many moving parts as with the spinning putting technique so there is less to get wrong. If you do the putt correctly, your body should be lined up with the basket and it’s just a straight shot to the hole.

Point and shoot as they say. If you’ve aimed correctly and made the correct judgment for distance, you should make the putt.

Another great benefit of the push putt is if you do misjudge the putt, you are far more likely to miss short or hit the basket and have a nice tap-in putt.

With a spin putt, you might release the putt too early or too late. This can result in missing to the left or right and the disc flying past the basket. You could end up with a long comeback putt.

When push putting, you don’t have to worry about releasing too early or late and the disc being off to the left or right. You’re lobbing the disc at the basket in a straight line. You can only mess up by giving the putt too much or too little.  

If you are off on your putt the disc hits off the top of the basket, the bottom of the basket or it doesn’t make it all the way to the basket. Rarely do you see if go over and if it does, the disc won’t likely fly as far as with a spin putt.    

Drawbacks Of Push Putting

The push putt isn’t perfect and with any putting style, there are drawbacks.

Wind affects the flight of the disc more when push putting than it does with spin putting. When executing a push putt, the noise of the putter is slightly up which gives a greater chance for the wind to blow the disc off course.

Another drawback to the push putt is its reach. It’s difficult to reach the basket outside the circle.

Most push putters are only using the style inside the circle and adding either more spin to get the disc to carry to the basket or using a jump putt.

It may also be different to use the push putt when there is a low ceiling. Push putting is similar to shooting a free throw so there is an arch in the flight. A low ceiling obstacle can prevent you from making a putt.

So if you are really struggling with consistently knocking down your putts you should really consider trying the push putting style. While it’s not perfect, the may thing this putting style has going for it is the ability to repeat the putting motion over and over which leads to sinking your putts more often and ultimately getting lower scores out on the course.    

Image Credit Flickr Creative Commons – Jeffrey

Review This Disc

Posted on

Everything You Need To Know About Disc Golf Fade

No ratings yet.

Do you know what fade refers to in disc golf? Are you using disc golf fade to your advantage? Is fade costing you strokes on the course? Have you been using a disc with low fade because you think you need a straighter throw?

If you are interested in answering these questions and more, keep reading.

In this article, I’m going to cover everything you need to know about fade.

We’ll discuss what fade is and how to tell how much fade a disc has. We’ll also cover when you should choose a disc with more fade verse one with less fade.

What Does Fade Refer To In Disc Golf?

Disc Golf Fade


Please note we’re supported by our readers. When you buy through our links we earn an affiliate commission. Thanks for your support!

Fade refers to the tendency of the disc to turn at the end of its flight.

If you are familiar with disc golf or have thrown a disc golf disc before, you may have noticed that at the end of a disc’s flight the disc tends to turn and doesn’t continue flying straight.

For a right-handed player throwing the disc backhanded, the disc will usually turn to the left. For a left-handed player, it tends to turn right.

This isn’t always the case but it usually is.

In disc golf, fade is how much or how little the disc will turn as it loses speed.

How Can I Tell How Much Disc Golf Fade A Disc Has?

You could throw a disc and watch how much it turns but an easier way to find out is by referencing the flight rating system.

If you aren’t familiar with the system, most discs have a four numbered rating system printed on them.

The last number in the numbered system is the fade rating.

Fade is measured between 0 and 5.

Discs with a 0, meaning they have no fade, should not turn at the end of flight and should continue straight. Discs with a fade rating of 5 will fade the most.  

Using Discs With High Fade

Discs with a lot of fade can be very useful.

One use for these discs is shot shaping. Taking advantage of the disc tendency to hook at the end of its flight might be the only way to set yourself up for a good putt.

For instance, you might find yourself on a hole that has a sharp turn to the left before you reach the basket. If thrown right, discs with high fade will naturally turn here and head toward the basket.

They work great in a headwind.

When thrown in a headwind, discs will usually act more understable than when thrown in no wind.

This usually means that for a right-handed backhanded player, the disc will likely turn more to the right.

Using a disc with more fade will counteract this effect.  

Use them for distance control.

This may not be the first thing you think about when you consider high fade discs.

It may even seem like a drawback for throwing these types of discs but in the right situation, it makes sense.

Fade can be very predictable and I you are familiar with the disc you are throwing, knowing when it will fade will help you make better judgments about the throws you take.

A good example of distance control with fade is a hole that has a hazard.

If you throw too far you risk landing in the hazard, so using a disc with high fade could reduce this risk.    

Take advantage of the hyzer.

Having extra fade can be beneficial for any type of hyzer shot. Disc with high fade will tend to hold the hyzer line better than low fade discs.

This is true for regular hyzer throws, spike hyzers, and flex shots.

Because you are throwing discs with more fade, you can trust them to hyzer out at the end of their flight.

They also tend to skip more so if you need a shot to skip toward the basket, consider using a disc with more fade.

Using Discs With Low Disc Golf Fade

Discs with low fade could be used for two main reasons: extending the distance of the flight and achieving a straight finish.

When it comes to distance, throwing a disc will low fade makes sense.

Instead of the disc hooking one way or another and cutting the throw short, the disc will continue flying straight.

This means the disc will stay in the air and continue to move forward, archiving a longer flight.

Another great reason to throw discs with low fade is to take advantage of the straight finish.

For instance, if you find yourself staring down a tunnel shot, you’ll want to grab a low fade disc. Even if you manage a clean, straight shot, if the disc fades too much you run the risk of hitting an obstacle.

Final Thoughts

I hope this article was a great resource to enhance your understanding of fade.

Knowing when to grab a disc with a lot of fade or a disc with very low fade will come in handy out on the course.

Fade can be a useful tool if you know how to use.

Whether you are using a high fade disc so it finishes left and skips toward the basket or you are going with a low fade disc because you are throwing down a tunnel.

I recommend you take to a field and grab some discs with varying levels of fade so you can see the difference in how they fly.

You can thank me later.

Happy fading.

Flickr Image Creative Commons – IMCBerea College

Review This Disc

Posted on

How To Break Your Own Disc Golf Distance Record

No ratings yet.

Please note we’re supported by our readers. When you buy through our links we earn an affiliate commission. Thanks for your support!

Would you like to throw a disc golf driver really far?

I’m not talking about far enough to reach a disc golf basket from the tee. I’m talking world record-breaking distances.

Well, maybe not world record breaking distances but at least personal record-breaking distances.

If this sounds like a fun experiment keep reading because I’m about to outline 6 steps you’ll need to take to reach super far distances with your favorite driver.

And maybe, just maybe you’ll break a record or two.

Let’s get into it.  

Use the right disc

For this max distance technique, we’re going to use more understable distances drivers. These discs will work perfect for the amount of power we’re going to throw to reach such a long distance.

They will also allow us to flip the disc and ride the wind to fly far.

Leave your stable to overstable distances drivers at home. On the course, they give us the consistency we need but when throwing really far distances they aren’t what we need.

If you are looking for a great understable distance driver check out our article here on the best options.

If you use a lot of max weight discs, you want something lighter for this endeavor. The two past distance recorder holders used blizzard bosses to reach the distance.

Check out the Blizzard Boss on Amazon.

So you are going to want to use a similar plastic when going big. Something like Innova’s Blizzard plastic, Latitude 64’s opto air or Discraft Z lite would work well for reaching the horizon.   

Use the right drive

For a monster drive like we’re trying to reach, we’re going to be using the backhand technique. To help add more power and distance, I recommend using the 360 backhand drive.

If you are unfamiliar with this method, you are adding a full 360-degree spin to your run-up to help generate more power and speed before your release.  This will take some getting used to and I recommend getting the form down before you go out to a field and try to break your distance record.

Here is a great slow motion video of one of the past disc golf world record distance holders, Simon Lizotte perform a 360 drive. 

Use the right release

We’re looking to throw the disc high and with some hyzer. If the wind is blowing right, it should flip your disc and carry it super far.

You reach back is probably going to be different than you are used to throwing. In case case you are reaching back at a downward angle and releasing above your shoulder.

If you need a benchmark, trying reaching back toward your hip and reaching up in a straight line.

This make take some time and practice throws to get the perfect release for your power and body type. Keep at it.

It will all be worth it to watch your disc soar through the air and toward the horizon.

Use the wind correctly

When trying to achieve your maximum disc drive, you’ll need to use the wind correctly. This may be one of those rare occasions in disc golf that the wind could be consider your friend.

We’re looking for the wind to carry our discs further, not blow them off course. In this case, since we are throwing backhanded, we are looking for the wind to be blowing over our non-dominant shoulder.  

So for a right-handed player, the wind should be blowing left to right.

The perfect speed for maximum distance seems to be from 15 to 20 miles an hour. This is the perfect speed to carry your disc correctly.

If are you trying to go for a personal maximum distance drive you’ll want to avoid a direct tailwind or headwind.

A tail wind will tend to push your disc down and prevent it from going as far as it should. A headwind will push your disc too high.

While the wind can be your friend, in these two cases it won’t be. Be sure to position yourself in a way that you can maximum the winds affect on your disc and carry it as far as possible.

Think of it like teaming up with nature.   

Have the right attitude

Don’t let it get to you when you don’t hit the right line all the time. This is a numbers game and you aren’t going to release the disc right every time.

Remember, this is supposed to be a fun experiment.

As disc golfers we have it in our head that consistency is the most important thing and usually that’s case but when it comes reaching larger distances with a disc, we’re sacrificing power for consistency and accuracy.  

Keep throwing over and over again and eventually you’ll get there. Enjoy watching the disc fly when everything goes right and grab another disc and go again when it doesn’t.

Pick the right location

Finding the perfect location for this challenge might be the most difficult step in this process especially if you live in a metropolitan area.

Ideally, you’ll want an open field or area that’s clear of any obstacles that could stop the disc prematurely.

Also, you don’t want to run the risk of hitting someone’s car or home.

The perfect spot would be clear for 500 feet or more from the area you play to launch the disc. You’ll want 360 degree of open area because you’ll need to match adjustments to the direction you are throwing based on how the wind is blowing.

You may also want to bring a group of people to help retrieve your discs, keep an eye on where you discs lands and hep you measure the distances you’ve thrown.

Final thoughts

What are you waiting for? Grab a bunch of buddies and a couple of understable light weight distance drivers and go do something amazing.

You may not break any world records but I promise you’ll have a great time. Happy driving!  

Flickr Creative Commons Credit – Squaw Valley Alpine Meadows

Review This Disc

Posted on

How To Throw A Roller In Disc Golf

No ratings yet.

Rolling Beyond Boundaries: Unlocking The Secrets Of The Roller Shot In Disc Golf

Disc golf is a thrilling sport that combines the precision of golf with the exhilaration of disc throwing. Among the various shots in disc golf, the roller shot stands out as a challenging and exciting technique. This shot involves throwing the disc on its edge, causing it to roll along the ground before transitioning into a controlled flight path. In this article, we will delve into the intricacies of throwing a roller in disc golf, providing valuable tips and techniques on how to throw a roller in disc golf.

Understanding The Basics Of A Roller Shot

Roller Shots, Part 2: Now we tell you How

Before attempting a roller shot, it’s crucial to understand the fundamental principles behind it. The roller shot is executed by throwing the disc on an anhyzer angle, where the outer edge of the disc is lower than the inner edge. This angle allows the disc to roll naturally along the ground once it lands, utilizing the ground as a means to gain distance and navigate obstacles.

Disc Selection: Choosing The Right Disc

How Many Discs Are Needed For Disc Golf? (For Beginners)

When it comes to executing a successful roller shot in disc golf, the disc you choose plays a crucial role. Selecting the right disc can significantly impact your ability to achieve the desired flight and distance. Here are some key factors to consider when choosing a disc for the roller shot:

  1. Low-Profile Edge: Opt for a disc with a low-profile edge. The lower edge allows for better ground contact, reducing the chances of the disc bouncing or catching on the ground during the rolling motion. This ensures a smoother and more controlled roll. Look for discs with a flatter and less pronounced rim, as they tend to have a lower profile.
  2. Stability Rating: Consider the stability rating of the disc. For roller shots, understable discs are typically the preferred choice. Understable discs have a tendency to turn to the right (for right-handed throwers) during the initial part of the flight. This characteristic is beneficial for achieving the desired anhyzer angle required for the roller shot. The understable nature of the disc allows it to naturally roll along the ground after landing.
  3. Wide Rim & Concavity: Discs with a wider rim and a slight concavity can enhance the performance of your roller shots. A wider rim provides additional stability during the release, helping to maintain control and accuracy. The concavity of the disc, such as in fairway drivers or distance drivers, can assist in achieving the desired roller flight. These types of discs are designed to generate more glide and carry, which can be advantageous for achieving longer and more controlled rolls.
  4. Consider Disc Weight: The weight of the disc is also worth considering. Lighter discs tend to have less resistance when rolling on the ground, allowing them to maintain their momentum and cover more distance. However, keep in mind that extremely lightweight discs may be more prone to wind interference, so finding the right balance is crucial. Experiment with different disc weights to determine what works best for your throwing style and the prevailing conditions.
  5. Personal Preference: Ultimately, disc selection for roller shots also comes down to personal preference. Each player may have their own preferred disc characteristics and flight patterns. It is essential to experiment with various discs and find the ones that feel comfortable and suit your throwing style. Don’t be afraid to try out different discs and seek recommendations from experienced players to find the perfect match for your roller shots.

Remember, choosing the right disc is just one piece of the puzzle. Developing proper technique, mastering the anhyzer release, and adapting to different terrains are equally important in executing successful roller shots. Combine the appropriate disc selection with practice and refinement of your throwing skills to maximize the potential of your roller shots in disc golf.

If you’re ready to take your roller shots to the next level, consider trying out some of the best roller discs available. These discs are specifically designed to excel in roller shots, offering the perfect blend of stability, glide, and ground contact. Check this out!

Remember, the disc you choose ultimately depends on your personal preferences and throwing style. It’s always recommended to test out different discs and gather feedback from experienced players to find the perfect match for your roller shots.

So, if you’re ready to elevate your roller shots in disc golf, why not explore these top-notch roller discs? Equip yourself with the right tools and continue practicing your roller shot technique to unlock new levels of precision and distance on the course.

Get out there, experiment with different discs, and enjoy the thrill of executing flawless roller shots in your disc golf game!

Grip & Stance: Setting The Foundation

To execute a successful roller shot, it is crucial to maintain a proper grip and stance. When gripping the disc, ensure that your thumb is placed on the inner rim, providing a firm hold. Your grip should be comfortable but not overly tight, allowing for a smooth release. For your stance, adopt a wider and more staggered position compared to a standard throw. This wider stance will provide stability and enable you to generate more power.

The Anhyzer Release: Initiating The Roller

How To Throw The AnHyzer Disc Golf Shot - Disc Golf Dash

The anhyzer release is a crucial element in initiating a roller shot. Begin by aligning your body and the disc slightly to the right of the intended target if you’re right-handed (reverse the alignment for left-handed players). As you execute the throw, tilt the outer edge of the disc downwards while maintaining a smooth, fluid motion. This technique will help achieve the desired anhyzer angle, setting the disc on the intended roller trajectory.

Managing Power & Speed: Achieving Accuracy & Distance

Controlling the power and speed of the roller shot is vital to achieve accuracy and distance. Start with moderate throwing power to get a feel for the shot and gradually increase the power as you become more comfortable. Avoid exerting excessive power, as it can lead to instability and errant throws. Finding the right balance between power and speed is crucial for a successful roller shot.

Reading The Terrain: Navigating The Course

Understanding the terrain is essential for executing a well-controlled roller shot. Analyze the surface and consider its texture, slopes, and potential obstacles. Look for areas with shorter grass or harder ground, as they offer better conditions for the disc to roll smoothly. Adjust your angle and release point accordingly to account for any obstacles in the roller’s path, allowing the disc to navigate around them effectively.

Experimenting With Different Release Points: Fine-Tuning Your Shot

Mastering the roller shot requires experimentation with release points. Vary the height at which you release the disc to achieve different flight paths and distances. Higher release points tend to produce longer and flatter rolls, while lower release points create shorter, more vertical rolls. Dedicate time to practice and fine-tune your release points to develop a better understanding of how the disc responds to different heights. By experimenting with various release points, you can gain greater control over the roller shot and adapt to different course conditions.

Practice, Patience, & Persistence: Mastering The Roller Shot

As with any aspect of disc golf, mastering the roller shot requires practice, patience, and persistence. Here are some additional tips to enhance your roller shot technique:

  1. Start With Shorter Distances: Begin practicing the roller shot with shorter distances. This allows you to focus on the technique and control rather than solely on distance. Gradually increase the distance as you become more comfortable and proficient in executing the shot.
  2. Record & Analyze Your Throws: Use video recording or ask a friend to observe and provide feedback on your roller shots. Analyzing your form, release angles, and flight path can help you identify areas for improvement and make necessary adjustments.
  3. Mental Visualization: Before attempting a roller shot, visualize the flight path and desired outcome in your mind. This mental preparation can enhance focus and help you execute the shot with confidence.
  4. Learn From Experienced Players: Seek advice and tips from experienced disc golfers who have mastered the roller shot. They can offer valuable insights, techniques, and practice drills to help you refine your skills.
  5. Practice On Different Terrains: Test your roller shot technique on various terrains, such as grassy fields, wooded areas, or courses with elevation changes. Each terrain presents unique challenges that will sharpen your ability to adapt and execute the shot effectively.
  6. Embrace Failure & Learn From Mistakes: It’s important to remember that mastering the roller shot takes time and patience. Embrace failures as opportunities for growth and learning. Analyze your mistakes, adjust your technique, and keep practicing with a positive mindset.
  7. Fine-Tune Your Timing: Pay attention to the timing of your release. Experiment with the speed at which you release the disc during the anhyzer angle, as it can affect the roll and flight path. Focus on finding the right balance of power and timing to achieve optimal results.
  8. Incorporate Fieldwork & Drills: Dedicate specific practice sessions to fieldwork and drills that focus on the roller shot. Set up targets or markers at different distances and angles to simulate real-game scenarios. This will help you build muscle memory and improve your overall control and accuracy.
  9. Play With Confidence: As you become more proficient in executing the roller shot, trust in your abilities and play with confidence. Confidence can positively impact your throw and decision-making on the course, allowing you to execute successful roller shots when the opportunity arises.

Conclusion

Mastering the roller shot in disc golf requires dedication, practice, and a deep understanding of the technique. By comprehending the basics of the roller shot, selecting the right disc, mastering grip and stance, executing the anhyzer release, managing power and speed, reading the terrain, experimenting with release points, and practicing diligently, you can enhance your roller shot skills and elevate your game to new heights.

Remember that progress takes time, and setbacks are part of the learning process. Embrace the challenges, celebrate the successes, and continue refining your technique. With persistence and a solid foundation, you’ll be able to unleash powerful and accurate roller shots on the disc golf course, impressing your fellow players and taking your game to the next level. Embrace the journey, enjoy the process, and have fun as you become a master of the roller shot in disc golf.

Review This Disc