Posted on

How To Throw An Understable Disc

No ratings yet.

I don’t think understable discs get enough credit. It seems to me like their overstable alternatives get all the buzz. I’m not sure if it’s because the pros tend to throw beefy, overstable plastic but if you aren’t throwing understable discs you are missing out. Understable discs can work great in a lot of different circumstances. In this article, we’re going to go over how to throw an understable disc. We’re going to touch on what understable means and how releasing understable discs on different angles can affect the flight. We’ll also talk about other specific shots you can use your understable discs for. By the time you are done reading this, you have a better understanding of how to utilize your understable plastic.  

How To Throw An Understable Disc


Please note we’re supported by our readers. When you buy through our links we earn an affiliate commission. Thanks for your support!

What Is Understable?

So, first things first, what does understable mean? When we use the word unstable we’re referring to turn rating of the disc or the tendency of the disc to move left or right when it leaves your hand. For an understable disc, if you are a right handed player throwing backhand the disc will fly to the right after it leaves your hand. You hear people refer to understable discs as flippy. This just means that the disc has a higher tendency to turn over.

Angle Of Release

An understable disc is going to fly differently depending on how it is released. There are three main release angles a disc can be released on to manipulate the disc’s flight. These three angles are flat, hyzer and anhyzer. If you throw an understable disc with a flat release you are going to see a different flight than if you throw it on a hyzer.

Let’s take a look at how each release angle will affect the disc’s flight path. For each example, we’re going to use a right-handed backhanded thrower to explain how the disc will fly. If you are left-handed or a sidearm dominant thrower, you can adjust the example by using the opposite direction.    

Flat Release

An unstable disc released flat will have a tendency to turn right with it leaves the players hand. Depending on the fade the disc has, the disc will then fly straight and come back to the left as it hyzers out. This is normally described as an S-curve.   

Hyzer Release

An unstable disc released at a hyzer angle will tend to fly straight. It may fade to the left at the end of its flight. This flight path is normally referred to as a hyzer flip.

Anhyzer Release

An unstable disc released at an anhyzer angle will turn faster to the right than a flat release. The disc normally keeps moving right and depending on the fade and speed the disc is released at, the disc should finish right.  This is normally referred to as a turnover shot. If the disc is released with enough anhyzer it may turn all the way over and continue rolling on the ground. This type of shot is referred to as a backhand roller or just a roller.

Types Of Shots You Can Use An Understable Disc For

  • Hyzer Flip
  • Roller
  • Turnovers
  • S-Curve

We touched on these shots when we discussed the release angle above but you can use an understable disc to accomplish all of the shots listed above. This just highlights all the situations you can use an understable disc. Learning how to throw an understable disc will in handy in plenty of scenarios on the disc golf course.    

Understable Discs Are Recommended For

  • Beginners
  • Tailwind
  • Slow speed

Not only can you use understable discs for hyzer flips and other useful shots, but they also recommended for beginners, players with slower arm speeds and with tailwinds. Newer players and players with slower arm speeds will find understable discs easier to throw. Players throwing understable discs with less speed will get a straighter flight path than if you tried to throw discs with more stability.

Understable discs are recommended for tailwinds because tailwinds make discs fly as if they were more stable than they are. This happens because the stability of the disc is affected by the speed the wind flies across it. This could also be said that the disc seems to be moving slower than it really is because of the way the wind is affecting the air around it. If you were to throw a stable or overstable disc in a tailwind the disc would tend to turn left and hyzer out to earlier. Throwing an understable disc will in ensure the disc flies further.    

Image Credit Flickr Creative Commons – Dan Keck

Review This Disc

Posted on

20 Disc Golf Game Variations You Should Be Playing

No ratings yet.

While everyone here loves the game of discs golf, playing the same rounds over again can get a little boring. That’s why I’ve compiled a list of twenty disc golf game variations to help you spice up your normal play.

The next time you are on the course will your buddies try one of these disc golf game variations and enjoy the game you love in a brand new way.

disc golf game variations

Please note we’re supported by our readers. When you buy through our links we earn an affiliate commission. Thanks for your support!

Bag Raid – This game is played just like stroke play except that the player with the lowest score on each hole is able to select an opponent’s disc. This disc is removed for the player’s bag. The player with the lowest score can also choose to return a disc to their bag if it was removed.

Barkie – In this game, disc golf is played as normal except each player can earn a point by hitting a tree. At the end for the round, the points that were earned by hitting trees are subtracted from the player’s score.

Bingo Bango Bongo – Each hole has 3 points. The player that throws the farthest off the tee is awarded a point (Bingo). The player that is closed to the basket on the second throw (BANGO). The first player to complete the hole (BONGO). After all players have thrown off the tee, the player furthest away from the basket throws next.

Bizzaro Golf – Every hole is played with a random set of rules. For instance, all players must use a putter, every player throws using their off hand, each player must use a forehand shot while driving or everyone switches bags. All holes can be decided before the round or on each hole a player can decide the rules.  

Disc Steal – All players start this game with the same number of discs. After each hole, the player or players with the best score gets to steal a disc from an opposing player. If a player has all their discs stolen, they are removed from the game.

Drink Up – The player that has the worst score on a hole must take a drink. Any player that hits a tree, lands in water or goes out of bounds must take a drink.

Hate ‘Em – At the beginning of the game, each player selects a number of holes. The number is predetermined by the players and on each hole selected the player that selected it gets a par for that hole.

Match Play – The lowest score for a hole wins a point. The player that finished the game with the most points wins the game. If a hole is tied, points aren’t pushed to the next hole.

Nomination – In this game, before each throw players decide on two discs they want to use. Their opponents then choose which disc of the two they are allowed to use. You could all more variation and by adding more discs. For instance, a player selects three discs from their bag and their opponent then selects which disc they can throw.

Piggyback – In this game, all players drive as normal. Once everyone has thrown from the tee, each player can decide to piggyback off another player. This means they can choose to throw from their lie. No player’s lie can be selected by another player more than once each hole.

Random Disc – At the beginning of each hole, each player selects a disc form their bag and places them in a pile. All players close their eyes and choose a disc from the pile. All players must throw from the tee using the disc they selected. An alternative to this would be that each player has to use the disc at least once before they complete the hole.

Ript Revenge – This game requires a deck of RIPT Revenge cards. All players begin the game with the same number of cards. After each hole, the player with the best score scores a point. All other players much draw a card and play the next hole according to the card’s requirements.

Get A Deck Of Cards At Amazon

Scratch Play – In this variation, points are given based on score. For a Bogey, players are given 0 points. For Par, one point is given. For Birdie, two points are earned.  If a player gets an eagle five points are given. When a player scores two consecutive bogeys they lose all points earned.

Shootout – In this game, the player that scores the worst on each hole is eliminated. The game can be played two ways. Either the player must receive the worst score outright to be removed or during ties a tie breaker must be used. To win the game you must be the last player left.

Sorry, Dude – Each player gets a number of cancels before the round is played. A player can use a cancel by saying sorry dude and the opponent player must re-do their throw.  

Safari – The player whose turn it is for honor gets to decide to play a hole from the regular tee or call safari. When declaring “safari”, they get to select a new tee to drive from. Honor can go to the player with the with the best or worst score or players can choose to alternate.

Skins – Before the round, all holes are assigned a skin. A skin can be a number of points or an amount of money. A skin is won by the player that has the best score on the hole. If a tie occurs, the skin is pushed to the next hole. For more information on this disc golf variation, check out our article here.

Throw ‘Em All – Players must throw every disc in their bag once before they are able to throw any again. Once they have thrown every disc they can throw each a second time and so on until the round is complete. A variation to this game would be to keep with the basic premise of throwing every disc in your bag before you are able to throw them a second time except when putting.

Worst Shot – After all players drive, the worst lie is chosen and all players must throw from this lie. An alternative to this game could be the best lie is selected and each player throws from this lie. To mix it up even more, each hole could alternate between the best and worst lies.

Flicker Image Creative Commons – MarkScottAustinTX

Hope you like my list of 20 disc golf game variations you should be playing!

Review This Disc

Posted on

Best Disc Golf Baskets For The Money

No ratings yet.

Please note we’re supported by our readers. When you buy through our links we earn an affiliate commission. Thanks for your support!

Having your own disc golf basket can be great. All you have to do is walk out your door and into your yard and you can practice the game you love just about anytime.

It’s a great way to ensure your putting game is always on point so you’ll save those extra strokes when you get a chance to hit the disc golf course.

Finding the money to buy a $100 to $200 dollar basket may not be so great. So if you are on a budget but still want a disc golf basket for your home, we’ve got you covered.

We’ll share our top picks for the best disc golf basket for the money.

Find a full list of practice baskets for sale here.

Here are our picks for the best economical disc golf baskets:

  • Yaheetech Portable Disc Golf Basket
  • Best Choice Products Portable Disc Golf Basket
  • Titan Disc Golf Basket Double Chains Portable Practice Target
  • Nova Microdermabrasion Portable Disc Golf Basket Target

Let’s take a look at these baskets in greater detail:

Yaheetech Portable Disc Golf Basket

With such a great price, this basket made by Yaheetech is a great option for any player on a budget. It’s a quality basket so it will hold up if you choose to leave it outside for long periods of time. No need to worry about the weather as it both rust and water resistant.

It has twelve chains that hang down from the basket with four more chains that run along horizontally. Which is great because you don’t have to worry about your discs not catching the chains.

If you don’t plan to leave the basket outside, the Yaheetech Basket is very lightweight and easy to pick up and carry. You can move it around your yard with ease so you can get different looks at the basket or you can move it back into the garage once you’re finished with your regular putting practice.

Another great thing about this basket is if you need to store it for an extended period of time you can disassemble it for easier storage. I can’t say enough good things about this one. It’s a great option for new players to more advanced players that want their own personal basket and for such a great price.

Check it out on Amazon.

Best Choice Products Portable Disc Golf Basket

If you are looking for a great portable disc golf basket but don’t want to pay too much, this one made from Best Choice Products is an excellent choice. It’s made of quality steel so you know it will stand up to any weather conditions.

Around the top of the basket hangs 14 heavyweight chains with 4 more running along in a crisscross pattern to help prevent spit outs. It’s free-standing and portable so you can take it just about anywhere. It works great when practicing in your yard but you could also take it to a nearby park or any other location that you might want to get a disc golf practice session in.

When you first receive the basket it’s super easy to snap together but it’s also just as easy to break it down for storage. So if you don’t want a basket taking up space in your garage during the colder months, you should consider getting this one.

It comes with a yellow flag on top, so you’ll be able to focus on the target quite easily. Having your own portable basket makes it easy to practice those touch shots from behind obstacles and the flag will make the basket easier to see. You can’t go wrong with this great lightweight basket. Grab one today!

Check it out on Amazon.

Titan Disc Golf Basket Double Chains Portable Practice Target

Another great option for an inexpensive lightweight basket is this one made by Titan Great Outdoors. They’ve delivered a good product for a great price with this basket.

It’s made with durable materials so you know it will last. The basket has 14 stainless steel heavy chains and is held together with steel rods that stand 55 inches tall. The basket and base are both galvanized.

It’s lightweight and portable so it makes a great option for an afternoon putting practice session. You can move it around your yard or another open space to get different looks at the target.

When you are done, it won’t be too hard to walk it back into your garage. It only weighs 31 pounds and you can remove the base to make it even lighter. A great basket to have around your house and you’ll likely see your disc golf game improve because it will be so easy to practice.

Check it out on Amazon.

Nova Microdermabrasion Portable Disc Golf Basket Target

This inexpensive basket is a great option for any disc golfer looking to own their own basket. It’s a durable product at a great price. One that will be easy to both pull the trigger on and set up in the yard.

It’s made with durable and weather resistant materials so you don’t have to worry about leaving it out overnight. This basket has 12 galvanized chains to collect your discs in and they will land in a sturdy metal basket below.

The basket is lightweight so you won’t have any trouble moving it around your yard or carrying it back to the garage. You can even take it to the park or a barbecue because it quickly snaps together. Taking it apart is just as easy when you are ready to go.

A great option for any disc golfer that wants to spend more money on discs rather than sinking all their cash into an expensive heavy-duty basket. Grab this basket and you’ll be able to practice at home anytime you want.

Check it out on Amazon.

Types of Disc Golf Baskets

All the baskets we’ve listed here are considered light-duty baskets. We’ll get into more of what a light-duty basket is and some of the pros and cons of owning one a bit later but before we do that we’d like to cover the other types of disc golf baskets.

Foldable – These baskets are great because they are so easy to transport. They are foldable up so they are great to take camping or to a barbecue.

Foldable baskets are made of canvas and aren’t designed to stay outdoors permanently. The DGA Mach Lite is a great example. Check it out on Amazon.

Narrow Target – If you are wanting to really improve your putting you should consider a narrow disc golf basket. The chain part of the disc golf basket is more narrow than a normal basket, making the target smaller.

This makes them a lot harder to hit so expect more missed putts if you decide to grab one.  The Dynamic Discs Marksman is a fine example of a Narrow Target. Check it out on Amazon.

Heavy-Duty – These baskets are what you would find at a professional tournament and disc golf courses. Permanent disc golf baskets are made to stay outside at all times and withstand the elements in all weather conditions.

They are more durable and of a higher quality than the light-duty models but also come with a higher price tag. These baskets are very heavy and are permanently fastened to the ground using concrete.

If you are looking for a basket that almost perfectly mimics what you’ll see out on the course than try a Heavy-Duty basket. The MVP Black Hole is a great Heavy-Duty Basket. Check it out on Amazon.

Light-Duty Disc Golf Baskets

For this article, these baskets are the star of the show. They are the smaller and slimmer versions of the heavy-duty style baskets.

These baskets normally have fewer chains, are often shorter and are made with lighter materials. As a result of these factors, they are the least expensive option.

Pros of Owning a Light-Duty Basket

The main selling point for these styles of basket is one we’ve already touched on a lot before and that’s their price. So if you are on a budget, these types of baskets are great.

They also work well if you would like to buy multiple baskets and set up a smaller course on your property.

Anther benefit which we’ve talked about before is how light these baskets are. This is great because they are so easy to move around.

You can set them down, putting a few times and then pick up the basket it move it to another location. Vareity will keep you sharp for those real putts during normal play.

Drawbacks of Owning a Light-Duty Basket

One of the main drawbacks of these styles of baskets is they have fewer chains than a regular or heavy-duty basket has.

This mean that when practicing you are using a different target then what you would see on the course. Another result of this is that you will probably experience more spit outs than normal.

Final Thoughts

Owning your own basket can be great for your disc golf game, especially your putting game. Having the option to practice anytime you want will lead to more time playing and lower scores overall.

A barrier to owing your own basket is the price. Some disc golf baskets on the market today can be quite expensive. Like the heavy-duty options, we decided before.

A great way to cut throw this barrier is buying a light-duty, inexpensive disc golf basket. We’ve outlined your best options all in one place.

So if you want a disc golf basket for your home but have held off buying one because of the price, check out one of these we’ve listed here.

Flicker Image Creative Commons – Michel Curi


Review This Disc

Posted on

5 Reasons You Should Be Spin Putting

No ratings yet.

Please note we’re supported by our readers. When you buy through our links we earn an affiliate commission. Thanks for your support!

Without question, the most important part of your disc golf game is putting. Even if you manage to throw super long distances, your lower scores can be hurt if you can’t sink your putts.

Practice and consistency are the keys to putting success. But how do you choose which approach to take?

There are lots of routes to take when deciding on which style to go with. I’ve written about them here. One great option is push putting. Which I’ve covered in detail here.

But the style we’re going to talk about today is spin putting. In this article, I’m going to give you five reason you should be spin putting. Let’s take a look at them.    

1. Great for Beginners

The spin putting technique is an excellent choice for a new disc golfer. The release needed to put spin on a disc is more intuitive.

Beginners are used to throwing a disc and using spin to help throw the shot. Spin putting is no different.

The motion used when spin putting is a throwing motion which is different from the pitch motion of the push putt. Putting in this way can be easier to aim because the putt basically flies in a straight line.

All these reason make the spin putt a great option for beginners to both learn and find success  

2. Less affected by the Wind

No one likes putting in the wind. Having your disc carried off target and float past the basket is no fun.

Adding more strokes to your final score is a bummer. That’s why learning the spin putt is so great.

The disc is less likely to be affected by windy conditions. The disc’s spin keeps the disc flying straighter and prevents the wind from getting under the disc and pushing it off course.

So even if you stick with your push putting style, learning the spin putt for those windy days is a viable option. If you play a lot in the Midwest, learning to push with spin is a must.  

For more tips on play in the wind, check out this article

3. Consistent at varying distances

One of the keys to disc golf success is being able to play consistently day in and day out. If you can throw the disc and know where it’s going to go every time you’ll play better.

Putting is the exact same way. Being able to keep your putting routine the same each putt is going to make it easier to knock down your putts overtime.

The spin putt will help you do that. Each putt, no matter the distance is going to be the same release point and the same angle. Not having to make the call each time you step up to a putt is going to lead to lower scores.   

4. Great for low ceilings

If you’ve ever had your putt blocked by a low hanging branch, you know it can be frustrating.

For the push putting style, in order to make a disc fly to the basket, the disc must be released nose up and fly in an arch toward the basket.

There is nothing wrong with push putting but if you have a low hanging ceiling or an obstacle it can be tricky to sink your putts. This is where the spin putt will shine.

Spin putting doesn’t require an arch. The disc will fly straight toward the basket, flying under any low ceilings.  

5. Works well outside the circle

Another drawback to the push putting style is it can be different to get the disc to reach the basket. You need to release the disc high and use your lower body to power the disc forward for extra distance.

Using a putter with extra glide can help it get there. This isn’t a problem when spin putting.

Releasing the disc on the same line with the same angle will get you to the basket each time if your aim is on point. Knocking down long putts outside of the circle shouldn’t be a problem with this approach to putting.   

Final Thoughts

If you’re new to disc golf, I hope you’ll consider the spin putt for your main putting style.

For beginners, it’s easy to pick up and learn. It works well in the wind and at long distances. Spin putting is a consistent motion from anywhere in or outside the circle.

nd you don’t have to be intimidated by a low ceiling. All these reasons make it an excellent choice. So, I hope you’ll choose to spin your way to putting success.  

Flickr Image Creative Commons – Virginia State Parks

Review This Disc

Posted on

6 Midrange Tips To Help Improve Your Disc Golf Game

No ratings yet.
disc golf midrange tips

Please note we’re supported by our readers. When you buy through our links we earn an affiliate commission. Thanks for your support!    

1. Use Them Off The Tee

If you aren’t already using your midrange discs for driving, you really should be. A lot of players have it in their head that they must use a driver off the tee but if you can get the distance with a slower speed disc, you should at least consider it.

Remember what I said early, these discs are the perfect combination of speed and precision? That means they are perfect for the tee box. Using these discs for distance shots means your placement of the throw will be more accurate than if you were using a fairway driver or distance driver.

Two situations mid-range discs are ideal for are shorter holes and holes that have a lot of trouble. Using a disc that can fly the distance and do it more accurately is a no-brainer.  The reason I recommend midranges for holes that have a lot of out bounds or hazards if for their accuracy. Because even if you are losing some distance, you’ll gain those strokes back by not going out of hands or skipping into a hazard.

So the next time you are considering which disc to use for your drive, consider your mid-range discs.

2. Use Them In The Woods

If you play a lot of wooded courses you may already know the power of these discs for dodging trees. When throwing a course or a hole that has a lot of trees, you’ll need to be more conscious of your discs flight path because there are more obstacles your disc can hit on it’s a way to the basket.

Midrange discs are perfect for the woods because of the extra control they give you. In the woods, you are going to want to slow down and focus on a deliberate, controlled throw. Midrange discs allow you to throw slow controlled shots but still get the distance you want to finish the hole.

Another great thing you can use for a midrange disc for in the woods is to hit gaps and throw straight lines. Depending on your arm speed, grabbing an understand midrange and throwing it softly or selecting a stable midrange and throwing it hard will give you the straight shot you need.

The next time you find yourself on a hole with a lot of trees you are going to want to reach for a midrange.

3. Use Them For Upshots

Another great use for your midrange discs is throwing upshots. When I’ve thrown my drive and have landed within approaching range of the basket, the first disc I’m considering is a midrange disc, especially if I have some distance to cover.

Midrange discs are great at this range because of how easy they are to control and how accurate they can be. If you have thrown a great drive on a par 4 hole and gotten some serious distance, it doesn’t matter much if your next shot doesn’t land near or in the basket.

No one wants to see their upshot come up way short or blow past the basket. We’d all rather have an easy, close putt when compare to a long tester putt. Using an accurate midrange will ensure you are closer to the basket more often.

While putters are super accurate for upshots, you should still consider reaching for a trusty midrange disc. You won’t have to put as much heat on the disc from longer distances and if you are like me, I tend to be less accurate when I’m trying to ensure the disc flies far enough.

Pull out a midrange on your next upshot. I promise you, you won’t be disappointed if you do.    

4. Great For Beginners

I think everyone’s first disc should be a midrange. A lot of players may have a problem with that. They might think a putter is a better disc for a newer player.

But hear me out, a good midrange disc can be the perfect disc for most situations. We’ve already covered how great they can be off the tee and for upshots. They work well in the fairway and they are super controllable. All the things a beginner needs.

When using a midrange for distance shots you are going to need to focus on your form and really concentrate. Starting out, you want to get a great understable midrange disc and focus on throwing it flat. Here are some great choices for understable midrange discs.

As you improve, you can get good stable midrange discs or if you are a real power player, an overstable midrange will be perfect for your bag.  But don’t toss those understable ones out. They will still be useful for turnover shots and hyzer flips.

If you are a beginner to disc golf or know a new player, get them a midrange disc.

5. You Can Flick Them

That’s right, folks, midrange discs aren’t just for your backhand. They work great for your sidearm too. A lot of people think you can just throw drivers when attempting a forehand throw but if you aren’t using your more accurate midrange discs you might be gaining extra strokes.

If you want some recommendations on the best midrange discs to flick check out this article here. In short, you are looking for two things in your midrange discs to make them easier to throw forehand. One is a lower profile. This will allow you to get a better grip and assist with having a good clear release.

Another thing you’ll want in your midrange discs is an overstable flight. When throwing a disc with the forehand technique, you usually put less spin on the disc than when throwing backhand. To counteract this lack of spin, you’ll want to reach for an beefy midrange disc.

The next time you need to flick a disc make it a midrange. You’ll get a more consistent and accurate flight which leads to a  lower score.

6. Dedicate Practice To Them

The last tip I have for you is practice. Like all other aspects of your disc golf game, you are going to need to dedicate time and practice to improve.

Along with practicing your driving and putting, it’s a good idea to include practice sessions dedicated to throwing your midrange discs. You’ll want to grab all the midrange disc you own, take them to a field and throw them over and over.

To keep it fresh and challenging, I’d recommend you work on both shot shape and placement. You’ll also want to throw each disc on a hyzer, flat and anhyzer using both the backhand forehand technique.

This will allow you to get to know these discs and you’ll be that much more comfortable using them the next time you need them.

For more ideas on practicing your midrange game, I recommend you check out this video.
Jesús does a great job of explaining multiple ways to tackle midrange practice.

https://www.youtube.com/watch?v=Csn-48fI2Kc&t=48s

Flicker Image Creative Commons – MarkScottAustinTX

Review This Disc

Posted on

How To Improve Your Disc Golf Drive

No ratings yet.

Please note we’re supported by our readers. When you buy through our links we earn an affiliate commission. Thanks for your support!

Disc golf is an easy sport to get into. You just need a couple of discs and access to disc golf course and you are all set for hours of fun.

But playing disc golf rounds with your friends will only get you so far. If you want to improve in disc golf, you are going to have to do more than just play casual rounds.

One of the main aspects of their disc golf game, that a lot of players want to improve on is their driving.

Maybe as a player, you aren’t hitting your lines. Maybe you just wish you could throw farther. Or maybe you aren’t as consistent as you want to be.

In this article, we are going to take look at two steps you can take to improve your disc golf drive. I don’t want to disappoint you, but these two things aren’t necessarily quick or easy.

With that said, if you want to improve your disc golf drive doing these two things will get you there. So, what are the two things I’m referring to?

To improve your disc golf drive you need to do these two things:

  • Video tape yourself driving
  • Practicing your drive in a field

It seems pretty simple, right? All you need to do is tape yourself and practice? It is very simple but sometimes the most simple things can be difficult. More about that later.

Taping yourself while driving

So, why do you need to videotape yourself? The only way to get better is to figure out what you are doing wrong and then change it.

Because you may think your drive is perfect. You might believe that when you throw a disc your body is doing one thing but after you check the tape, it’s really doing something else.

The importance of videoing yourself is verification. When you look at the tape of your drive, you know for sure what your body is doing during the drive and than it’s pretty easy to figure out what you need to work on to improve.

Once you figure out what you need to work on, keep taping yourself to make sure you are actually making a change during your drive.

Sometimes, it’s really easy to spot what you are doing wrong but then when you step up to the tee pad and try to execute, it’s a lot hard.  

The video will make sure you are doing what you think you are doing. It keeps you honest.

Field Practice is great for your drive

Practicing in a field can do wonders for your drive. When you figure out what you are doing wrong and how you can improve, you need to change your mechincies.

Once you’ve got down what you need to change, you need to set that change in stone. You need to change your muscle memory.

The way you do that is by going to a field and practice over and over again. Keep that camera (or phone) around to make sure you are throwing correctly but keep throwing.

Take multiple discs so easy to stay in the flow. I like having multiples of the same discs when doing field practice to fix form.

If you don’t have a lot of discs, it’s not a big deal. The main focus should be on mechanics.

Common Driving mistakes

So now that you know how to verify your driving form and how to fix it, you’ll need to know what you are looking for.

For this article, we are going to focus on the backhand throwing style, as it’s the most common style.

If you are a sidearm dominate throwing, you’ll still find value in taping yourself and practicing in a field but these lists of mistakes might not help you that much.

If you are looking for some help with your forehand check out this video of Nate Sexton. He’s a professional disc golfer then is known for his sidearm.

https://www.youtube.com/watch?v=SQ6Wutvn4Mg&t=287s

Alright, let’s get into the list of common mistakes for backhand throwers.

Open Driving Stance

If you are utilizing the X-Step during your drive, you might be doing this. The main goal of the x-step is to incorporate your legs into your drive.

This is important because your legs are the largest muscle group in your body. More muscle engagement equals more power and distance.

If you are ending your X-step your throwing arm foot pointed toward your target, you’re missing the engagement of your legs.

The fix would be to point your toe straight or a better way to phrase this might be perpendicular to your target. Slightly back would also works.

This allows your hips and legs to be engaged so you’ll get the most out of your drive.

Not Reaching back Straight

When reviewing the tape of your drive, you’re going to want to make sure you reaching back is straight and away from your body.

This allows you to pull straight throw and release the disc effectively. Two common mistakes are reaching back behind your body and reaching back above your shoulder.

If you are reaching back behind your body, you need to go around your body during the pull through. This causes you to lose power and sacrificing accuracy.

Reaching back too high also as similar drawbacks.

Not Following through to match your release angle

Not every hole on the disc golf course is going to require a straight shot. You aren’t always going to be pulling back on a line that is parallel to the group and releasing your disc flat.

A lot of situations are going to require a hyzer or an anhyzer shot, in fact, I’d venture to guess you are releasing your disc with hyzer and anhyzer more often than you are releasing it flat.

When doing this, you’ll want to make sure your following throw matches the release.

For example, if you are throwing a disc on a hyzer, you’ll want your reach back to start your reach back low and then end it high.

Not timing the reach back correctly

To get the most out of your drive, you’ll want to time the full extension of your right back with the last step in your x-step.

By last step, I mean the loaded step you take at the end of your x-step before you release the disc.

After this step, some players will have their other leg swing around their body and touch the ground. I don’t mean this step.

If this timing is off during your drive and you are pulling to early or too take, it can affect your throw in a negative way.

You will lose accuracy and sacrifice power.   

Additional Resources:

Disc Golf Driving Tips for Beginners

If you are new to disc golf, check out this article I wrote on beginner tips. If the article you just read on improving your disc golf drive seems too technical, check out this my tips six on driving for beginners.

It’s simple changes you can try to help improve your drive. Once you’ve found success with those tips, you can always come back and try videoing yourself and doing field practice.

How to add more distance to your drive

In the same way that my tips for beginners article simplifies driving for beginners, if you are interested in adding more distance to your drive by making simple changes to your drive, you’ll want to check out my article on throwing farther.

It gives you ten things to try to help increase your distance while driving.

How to break your down distance record

If you are interested in throwing really far you might want to check out the article about how to break your own distance record.

This article is specifically focused on throwing really far without much consideration for consistency or accuracy.  If you are interested in pushing your distance limits give this article a read.

Driving Clinic Video

Check out this video of Nate Sexton and Sarah Hokom doing a back hand driving clinic. They are both professional disc golf players so they know what they are talking about.

https://www.youtube.com/watch?v=7JpY1m9vx2A&t=658s


Flickr Image Creative Commons – USAG- Humphreys

Review This Disc

Posted on

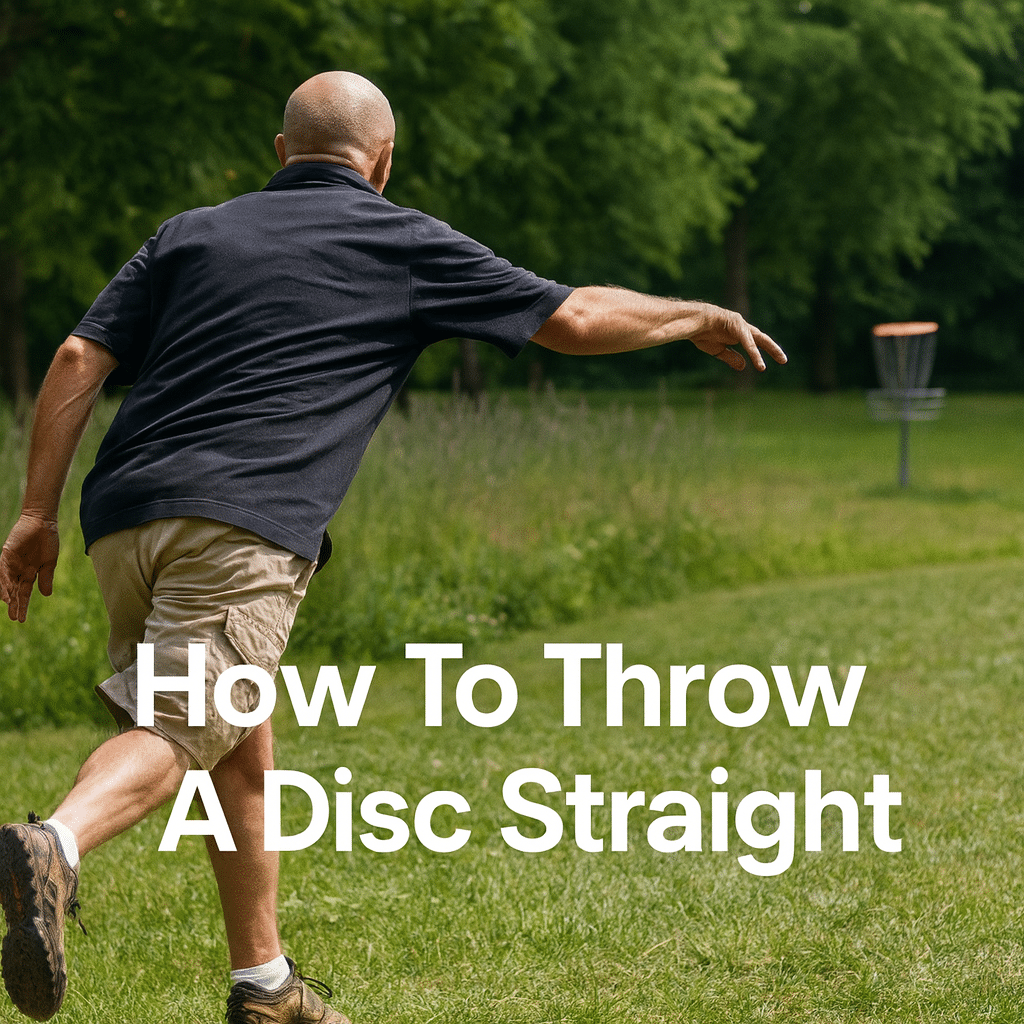
How To Throw A Disc Straight: 2 Methods For Achieving That Super Straight Flight Path

4/5 (1) There are few situations to find yourself in on the disc golf course that are more nerve-racking than trying to drive through a straight tunnel. If your throw is off or you miss your release, you could find yourself hitting a tree and having to search from your disc in the woods. No one wants that. The perfect throw for this situation would be a straight shot down the middle. But how do you throw a disc golf driver straight? In this article, I’m going to give you a few options and some pointers to help you on how to throw a disc straight.

When it comes down to it you have two main options for throwing a disc straight:

  1. Use a stable disc and release it flat
  2. Use an understable disc and release it with a hyzer angle

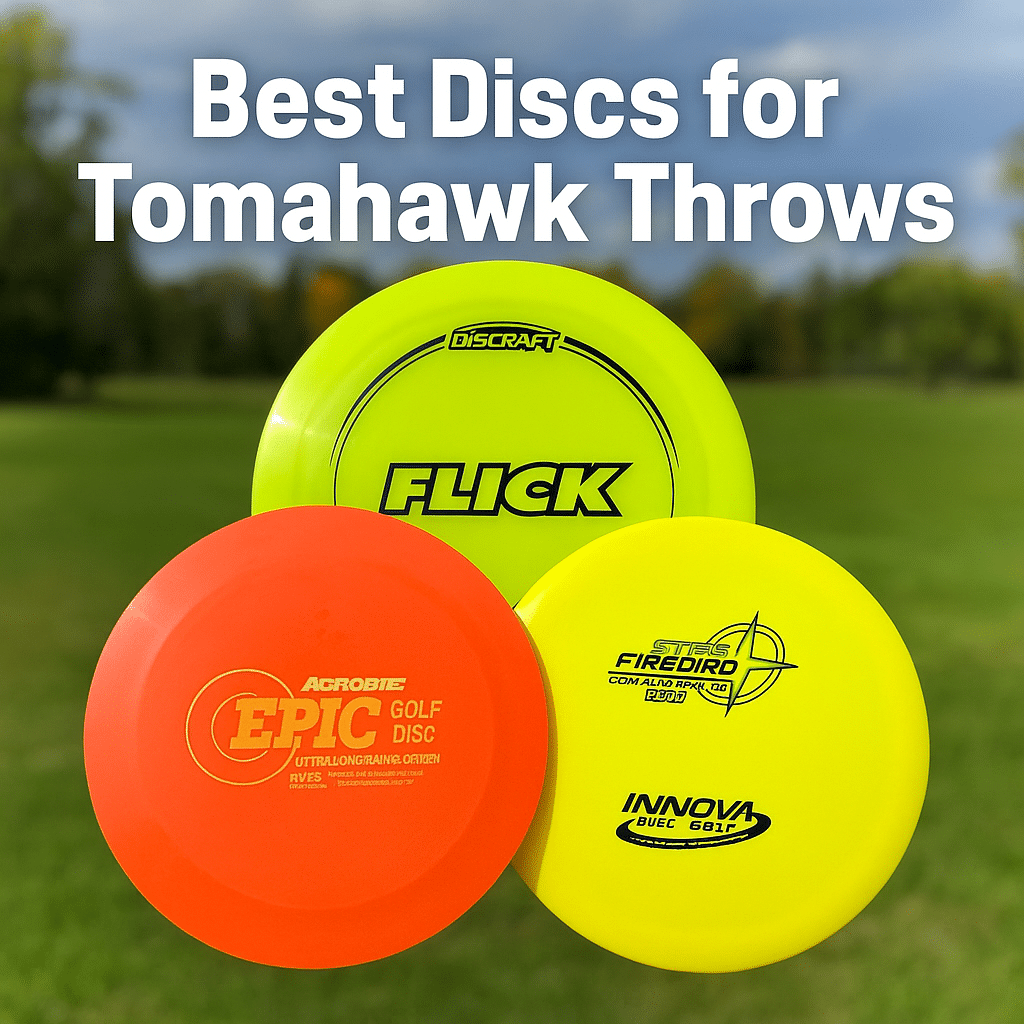
Now, there are some alternatives that can give you a relatively straight path and might be easier to throw. These include a tight S-Curve, a tight flex shot and an overhand throw like a thumber or tomahawk. But to get that true straight flight path, these are your options.

How To Throw A Disc Straight

Please note we’re supported by our readers. When you buy through our links we earn an affiliate commission. Thanks for your support!

Stable Disc With A Flat Release

The first option I’m going to suggest is throwing a stable disc with a flat release. By this I mean, taking your straightest flying disc and release the disc as flat as possible.

Now you might get different definitions of what a stable disc is, but for this article, I mean any disc that you can get to fly straight. A good rule of thumb, especially for newer discs, is a disc with a 0 to -1 turn rating.

The best way to know the turn rating of a disc is to use the flight rating of the disc which is usually printed somewhere on the disc itself. The turn rating is the third number in the sequence. You may also have a really beat in overstable disc that flies really straight for you. That would also be a good option to use in this case.

If you are attempting this approach but aren’t seeing a disc fly straight, there could be some reasons for that.

One of which might be that you aren’t pulling the disc throw in a straight line. This would primarily occur if you are throwing backhand.

If you are releasing the disc flat but aren’t performing your pull throwing in a straight line, this could cause your disc to hyzer or anhyzer instead of flying straight.

Focus on pulling the disc straight across your chest. You don’t want to be start high and release low or vice versa.

Another thing that could prevent a straight flight would be if you are rounding your wrist. You might be releasing the disc flat but then rounding it after the release which could cause the disc to turn over. You want to focus on keeping a straight wrist when throwing the disc.

Lastly, your run-up could be causing your disc not to fly straight. When attempting a straight path, you want to start with your run-up. For a backhand throw, keep your shoulder pointed at your target and move in a straight line toward it.

Try to refrain from starting your run up off to the left or right of the tee pad and then straighten up while on the pad.     

Understable Disc With A Hyzer Release

Another great option to achieve a straight flight path is using an understable disc and releasing it on a hyzer angle. This approach is commonly referred to as the hyzer flip.

First, you’ll need an understable disc. Again, we’ll need to look to the flight rating system to determine if a disc is understable.

The turn rating is the third number in the sequence and for a good hyzer flip disc, we’re looking for a -2 or lower rating. If you have a beat in stable or overstable disc that’s really flippy, that would also be a great option for the hyzer flip.

The trick with the hyzer flip is you will need to release the disc with a lot of force to get it to flip to flat. So focus on pulling your arm through quickly and generating a lot of snap. This can take a lot of practice so don’t be disappointed if you don’t get it right away.

You’ll also want to experiment with how much hyzer you release the disc on. If your disc continues to turn after flipping to flat, you may want to release the disc with more hyzer to counteract it. You might also try a less flippy disc.

Releasing the disc low and with the noise slightly down are also important to the success of the hyzer flip.

One drawback to the hyzer flip is the flight isn’t entirely straight. The disc has to turn in the beginning before flipping to flat and riding on a straight path.

You’ll need to account for this before you drive. If there is an obstacle that will stop the disc from turning, you may want to choose the stable disc released flat method instead.   

Pay Attention To Fade

Another detail you will want to pay attention to when trying to throw a disc straight is fade. Fade is the tendency on a disc to hyzer out at the end of flight.

So if you are right-handed and throwing the disc backhand, a disc with a lot of fade will tend to turn left as the disc starts to slow down.

The fade rating is the last number in the flight rating system. Discs with a 0 rating have no fade. As the number increases, discs will fade more at the end of flight.

So why is this important?

If you are trying to achieve a straight flight, you’ll want that straight flight to continue to the end. So what if you are able to throw the disc straight to the basket but the disc ends up fading to the far left and you miss your put because of it. What have you really achieved?

There are two strategies that can help with the fade problem. One of which is choosing a disc with little or no fade. Meaning discs with a 0 to 1 fade rating.

Another way to take fade out of the equation is to release the disc low. This way when it does fade at the end of flight, it will have less distance to travel before it reaches the ground.

So if you have a disc that you can throw real straight but it has a ton of fade, releasing the disc lower should help with that.

Final Thoughts

I hope you’ll at least be able to use one of these strategies to achieve a straight flight. You will likely not find success right away but if you continue to practice, you’ll get there.

In fact, I would recommend going to a field and practicing both before ever trying them on the course.

It’s bad enough executing a straight drive down a tunnel shot but will little to no practice it’s almost impossible.  

Flickr Creative Commons – Discover Lehigh Valley, PA

Review This Disc

Posted on

8 Disc Golf Winter Tips

No ratings yet.

Please note we’re supported by our readers. When you buy through our links we earn an affiliate commission. Thanks for your support!

As the days get shorter and the temperatures drop, you might be thinking it’s time to give up disc golf for a few months and head indoors for warm activities.

Sure you could do that but you risk losing all the progress you’ve made during the warmer months. Spending all the time inside in front of the tv and you’ll lose your competitive edge for sure.

And when the sun starts to shine and all the ice melts away, you’ll have to re-learn your forehand and putting stroke. No one wants that.

So before you think you need to give up the sport you love for a few months, consider my 8 disc golf tips. Hopefully, following these tips will help you stay warm and improve your game while playing in less than ideal conditions.

Plus, if you haven’t tried it yet. Playing disc golf in the snow can be a lot of fun.

1. Use Winter Plastic

The cold weather is going to change how your discs feel in your hand. You’ll notice that as the temperature drops your disc will become less flexible and less grippy.

If you play a lot in winter weather, you may also notice that your discs have a higher probability of cracking or breaking. Especially if you are hitting trees, concrete or metal baskets.

In order to counteract the effects colder weather has on the plastic you use, I recommend using grippy and flexible plastic. A great option for this would be GStar plastic made by Innova. It’s both grippy and flexible.

For more options for winter weather plastic check out this article.

If you hesitant about replacing all the discs in your bag with a premium plastic version of the disc, you might buy a lower grade plastic like Innova’s DX. The plastic does have adequate grip and flexibility to get you through the winter weather but if a disc does break it’s much cheaper to replace.  

2. Adapt to Disc Flight Changes

If you’ve ever played disc golf in the cold, you might have noticed that your discs don’t fly the same. Most players notice two main changes to their disc’s flight.

One is stability. When playing in the cold, discs tend to act more overstable.

Another difference is they don’t fly as far. When playing during the winter time, it’s not uncommon to see less distance on your drives.

You could make changes to your bag and add more understable discs that have extra glide to counteract the effects of winter.

Check out some of our articles on great understable discs. Here is the one about drivers and this is the one for midrange discs. 

Another option would be to adapt to these changes. Before you make a decision on the disc or shot understand that the disc will likely not fly as far and act more overstable. Either method should work.   

3. Dress for Winter Success

As the seasons change and the temperatures drop, you’re going to be playing in less than ideal conditions. You are usually going to experience colder and wetter playing conditions.

You’ll want to be prepared for this by wearing warm clothes that are waterproof. I recommend wearing multiple layers, as you can always shed layers as you warm up and add layers if you get colder.

Gloves are a must. You’ll need to keep your hands warm during play. Pay close attention to your shoes and socks.

Playing in sogging socks and waterfilled shoes is no fun on any day but add in the colder temperatures and you could end up with frostbite. Make sure you’re playing in waterproof shoes and socks or at the very least bring extras to switch into.

They are also many waterproof sprays you could add to your shoes for added protection.

Here is a great option for boots. Check it out on Amazon.  

4. Join a Putting League

If you don’t want to face the cold weather, why not just play indoors? That’s what an indoor putting league can allow you to do.

A group of disc golfers get together during the colder months and compete. The great thing about playing in one of these leagues is it allows you to keep practicing and improving on the most important part of your game, putting.

If you aren’t sure if there is a winter putting league in your area its best to start with the local disc golf club. If you ask around and find out there isn’t locally, you could start your own.

Here’s a link to guide on starting your own.

Also, dynamic discs has a winter marksman league program that will help with the equipment. Check that out here.    

5. Change your Expectations

Just like you aren’t going to play your best in the wind, you aren’t going to play your best in the cold. As the temperature drops, there are too many variables that change.

We’ve already discussed the effects that winter can have on your discs in both how they feel and fly. But other things change too.

With more layers on, you are less flexible and your bulky clothing can affect your throwing form. Your footing usually isn’t as good.

Ice and water can make the tee pads slippery. It’s more difficult to keep balance in the snow.

All these things are going to be difficult to overcome and play at your very best but that’s okay. Play for fun and practice.

When the warmer months come around and tournament play begins you’ll be sharper than the competitors that stopped playing when it got cold.    

6. Give special attention to your hands

Your hands are so important in disc golf. They are the only interface you have with the disc.

You use your hands to transfer the momentum and power you generate during your dive or throw to the disc. If your hands aren’t in the right place or your grip is off this can have a detrimental effect on your ability to throw well.

Because you need your hands for throwing the disc, especially your dominant hand, they are also exposed to the winter weather. I recommend keeping your non-dominant hand in some gloves as I mentioned before.

For the hand you use to throw the disc, keeping it warm in your pocket works well. I also like using hothands.

You can keep one of these in your pocket and basically warm up your hand instantly. Check out them out on Amazon.   

7. Don’t lose your discs

When playing in winter weather it can be easy to lose a disc. Lighter discs, like white and yellow, can be hard to find, especially in the snow.

For this, I recommend using discs that stand out against the white of snow. Don’t throw your favorite white disc in the snow. You are just asking to lose it or at the very least spend a few hours searching for it.

If there is a large amount of snow and your disc can get buried in the snow, the color of the disc isn’t really going to matter.

In this situation, I recommend using the ribbon technique. If you attach a ribbon to your disc, you’ll be able to see it and easily retrieve it.

Check out this video for more information on how to do this.

https://www.youtube.com/watch?v=Yq7onUGx5So

8. Cross Train instead

If you are still reluctant to play disc golf in the cold and snow, you could use the winter season to focus on something else. I suggest you use the extra time to cross train.

What do I mean by cross train? Disc golf can be a physically demanding sport where you use the same movements over and over again.

This can cause muscle imbalances and injury from repeated movements. So if you aren’t going to play disc golf during the winter, why not try another sport.

You could join a basketball league or take up racquetball. Both involve different physical movements than disc golf and have a cardiovascular competent.

If starting a new sport doesn’t seem like something you are in to, you could use the extra time in the gym. You can build up your muscles and help fix any muscle imbalances by hitting the weights.

And while you are spending time on the cardio machines, you can listen to your favorite disc golf podcast and still keep up to date on the sport you love!     

Flickr Image Creative Commons – Larry Jennings

Review This Disc

Posted on

Playing Disc Golf In The Wind

No ratings yet.

Please note we’re supported by our readers. When you buy through our links we earn an affiliate commission. Thanks for your support!

Playing disc golf in the wind sounds more like torture than fun to most disc golfers.

I’m not going to lie there have been a few times I’ve considered leaving early or driving to a more wooded course when the wind started to pick up.

No one likes having their putter pushed off course by the wind and missing the chains by a couple feet.

Hopefully, after reading this article you’ll have a better understanding of how the wind can affect a disc’s flight and ways to use the wind to your advantage.

We’ll talk about how headwinds, tailwinds, and crosswinds affect your discs differently, what you can do to counteract the effects and how to use the wind to your advantage.   

Headwinds

When facing a headwind you’ll want to grab an overstable disc with more fade.

A headwind will cause the disc to act less stable and tends to push the disc up. Using an overstable disc with more fade will help counteract the discs tendency to turn.

You’ll want to release the disc lower than normal to go against the upward push on the disc.

It’s also very important to keep the nose down, if the disc is released with even a slight nose up it will get caught in the wind and the disc will move up and back.

You’ll lose distance if you don’t keep the noise down.

Another tip for throwing in a headwind would be to use a faster disc. You’ll want a fast disc because relative to the wind, the disc is moving faster than normal without increasing your release speed.

This will ensure the disc flies as it should.

If you didn’t catch all that, in a headwind, you’ll want to throw a fast, overstable disc and release it low to the ground.

Check out this article for great overstable driver options.  

Tailwinds

When throwing a disc with the wind at your back, the disc will tend to act more overstable.

The wind will also cause a downward push on the disc, causing it to lose height faster than normal.

To counter these effects, throwing an over unstable disc is recommended. You’ll also need to release the disc higher.

A bonus for throwing in tailwinds is the disc will tend to carry farther. So if you throw your drive correctly and properly take advantage of a tailwind, you should see some added distance.

In a tailwind, you’ll want to throw a slower disc than normal. The disc is moving in the same direction as the disc so relative to the wind the disc is moving slower than normal.

Picking a slower disc will ensure the disc files as intended.

To sum it all up for a tailwind, you’ll want to use a slower, understable disc. You’ll want to release the disc higher than you would in calm conditions.

Check out this article for some great understable fairway driver options.

Crosswinds

Wind moving across the fairway will have a different effect on your disc depending on how you release the disc and whether you are right handed or left handed.

Making adjustments to your throw to counteract these effects are recommended.  You also might be able to change your shot to take advantage of the wind.

Left to Right Wind

For a right-handed player throwing backhanded in a left to right wind, if releasing the disc with hyzer the disc will tend to drop more than normal.

This makes sense because the flight plate is tilted in a way that catches the wind.

When throwing an anhzyer, the disc will be pushed up and move more to the right than expected.

If you are releasing the disc flat, you will notice the disc carrying to the right.

In a crosswind you have two options, you can play for accuracy or distance.

For accuracy, you’ll want to release the disc on a hyzer if the wind is moving left to right.

The disc will get pushed down and you’ll distance but it’s a more consistent shot.  

If you want distance, you’ll want to throw an anhyzer. This will allow the wind to pick up your disc and carry it.

Right to Left Wind

If the wind is moving the opposite way across the fairway, we can expect the opposite to happen.

When throwing a disc on a hyzer, the disc will tend to lift and move more toward the left.

If the disc is released with an anhyzer angle, it will get pushed down and toward the right.

A disc released flat will get pushed to the left since this is the way the wind is moving.

You have the two same choices in the right to left crosswind.

If you are going for accuracy, you want to release the disc on an anhyzer. You’ll see disc will get pushed down by the wind resulting in less distance but more accuracy.

If you’d like more distance, you’ll want to use a hyzer release. With this release, the wind will get under the disc, left if up and carry it forward.  

Putting in the Wind


Knowing how your putting style is affected by the wind can help you make a better decision when putting on those windy days.

In general, a push putter will be more affected by the wind than a spin putter.

While it may not be worth it to every push putter, learning how to spin putt may be a great alternative putting a style to pull out when the wind picks up.

If you are releasing your putters flat, the wind will have a similar effect on your putter as they do on your drivers.

In a headwind, the disc will tend to get pushed up. For a tailwind, the effect is the opposite and the putter will get pushed down.

When putting in a crosswind, the putter will get pushed the direction the wind is blowing.

Something else to think about is not everyone is going to release the disc flat.

For instance, when push putting the disc will have a slight nose up.

This could cause the putter to get pushed up higher when putting in a crosswind as well as to the left or right to take that into consideration when facing a windy putt.

Disc golf Wind Tips

Wind can blow in different directions

When considering a shot in the wind you need to realize that wind doesn’t just move in one direction.

Off the tee, wind could be moving one way but down the fairway, it could be moving another direction.

Keep this in mind when planning your shots on windy days.

Lower your expectations

You’ll need to come to the realization that you probably aren’t going to play your best in the wind.

There are too many factors to consider and unpredictable items that come into play to make all the right decisions.

Hopefully, this will allow you to relax and play better golf.

Practice in the wind

There is no substitute for practice and playing in the wind isn’t an exception.

To get better at playing in the wind you’ll need to expose yourself to it more often.

If you’ve been shying away from wind play consider it a learning opportunity instead.

Windy days are also a great time to get in some field work.

Change your Perspective

Think of playing in the wind like using nature to your advantage.

If you have it in your mind that wind is a disadvantage or an obstacle to overcome, it might be hurting your play.

While your shots are going to be less consistent on windy days, if you play the wind right you might see more distance.

Working with nature, instead of against, will lead to lower scores.  

Final Thoughts

I hope this article has helped you get a better understanding of how the wind will affect your disc golf play.

Hopefully the next time the wind picks up on your home course, you won’t run screaming to your car. Playing in the wind is something all disc golfers have to learn to deal with if they want to improve their game and get better.

With my tips, you should be able to make better decisions and see improvement when facing windy conditions.

Happy throwing in the wind!

Flickr Image Creative Commons – WxMom

Review This Disc

Posted on

What Makes A Disc Overstable?

No ratings yet. If you’ve heard the term overstable and weren’t sure what it meant, this is the right place for you. If you know what overstable means but still want to know what makes a disc overstable, this is also the right place for you.

In this article, we are going to go over what overstable refers to in disc golf but we’re also going to go further and discuss what physical properties make a disc overstable, what does overstable mean, what is turn and what are overstable discs used for and other questions you might have around this topic.

what makes a disc overstable


Please note we’re supported by our readers. When you buy through our links we earn an affiliate commission. Thanks for your support!

So let’s jump into the questions:

What Does Stability Mean?

Stability is a disc golf term used to describe the flight path of a disc, specifically the tendency of the disc to fly in a specific direction after it leaves a player’s hand.  So for a right-handed player throwing the disc using a backhand technique, if the disc tends to fly straight it would be considered a stable disc. If the disc tends to fly to the left, it is considered overstable. When the disc tends to fly to the right, it’s considered understable.

What Is Turn?

Turn is the rating system used to measure stability. When looking at most discs manufactured today, they usually have four numbers on the front of them. The third number in this rating system is the turn rating.

The turn rating system is a scale between 1 and – 5. Discs with a turn rating of 1 are considered overstable. Discs with a turn rating of 0 are considered stable. Finally, discs with a turn rating of -1 through -5 are considered understable.  

What Does Overstable Mean?

Like we discussed before, overstable refers to a disc that tends to fly to the right when thrown by a right-handed backhanded thrower. Discs that are overstable would have a turn rating of 1. When thrown at high speeds, overstable discs are less likely to turn over than stable and understable discs.  

What Physical Properties Make A Disc Overstable?

There are several disc properties that can affect the stability of a disc. For instance, higher speed discs with wide rims tend to be more overstable. Discs that are shaped like a dome tend to be less overstable or more understable. Discs with beaded edges tend to be more overstable. The plastic type used for the disc can also affect the stability of the disc which we will talk about in the next section.

Dave Dunipace the founder of Innova Champion Discs and the father of the modern disc says about overstability “A more reliable marker is the parting line height which is the separation line on the nose of the disc.” To go into what Dave said a little further, discs with a higher parting line will be more overstable and discs with a lower parting line will be more understable.

What Plastics Are More Overstable?

The plastic type your disc mold is in can affect the stability of the disc. If you have ever bought two of the same mold in two different plastics types, you may have noticed they fly differently. When it comes to Innova plastics, the Champion and Metal Flake plastic are the most overstable. Then comes Star, XT, DX, and Blizzard in that order.  

Something else to consider with disc plastic type and stability is the durability that the plastic provides. As discs are played with they began to ware and as they ware they tend to become more understable or less overstable. If the plastic type is more durable, it slows this process down and discs will maintain their initial flight characteristics longer.

What Are Overstable Discs Used For?

Overstable discs work great for spike hyzers and skip shots. They are recommended for more advanced players because those players tend to have a higher arm speed. The reason overstable disc work better for higher arm speeds players is they won’t turn over as easily. Similarly, overstable discs are more accurate when thrown in windy conditions. 

Closing Thoughts

To sum up what we just learned: overstable discs are less likely to turn over when thrown at higher speeds. They have a 1 turn rating. Many factors can affect the overall stability of the disc including the plastic type but Dave Dunipace states the most reliable factor is the parting line. Finally, overstable discs are recommended for advanced players and windy conditions.

Image Credit Flickr Creative Commons – Evan Lovely

Review This Disc