Posted on

13 Things You Should Consider Putting In Your Disc Golf Bag

No ratings yet.

There’s nothing worse than realizing, halfway through a round, that you left something crucial in your car. Over my years on courses of every condition, I’ve learned there are a handful of items I don’t walk out the door without. Here are 13 things I always pack—and why each one matters.

Why a Well‑Stocked Bag Matters

Disc golf isn’t just about your throws or your discs. It’s also about adapting to changing conditions, being self‑reliant, and avoiding avoidable mistakes. A good bag setup gives you flexibility, keeps you safe, and saves you from scrambling mid‑round.

The 13 Must‑Have Items

1. Snacks & Fuel

Rounds often stretch long, especially when you’re chasing lines or walking tricky layouts. I carry compact, non‑perishable snacks like beef jerky, granola bars, trail mix, or dried fruit. They’re light, won’t spoil, and give me energy when I need it most.

2. Insect Repellent / Bug Spray

If you play wooded or overgrown courses, bugs will find you. I keep a small pump or aerosol insect repellent in my bag. It’s saved me from dozens of itchy distractions—and helps when you’re creeping into thick rough or clearing brush.

3. Disc Golf Retriever

One of the best investments I’ve made: a retriever. Water hazards, ponds, deep brush—they’re all out there waiting to gobble discs. A telescoping pole or claw device pays for itself when you save even a few premium discs.

You can browse retrievers on InfiniteDiscs.com’s retriever section.

4. Towels (x2 if possible)

One towel for drying discs, another for your hands. Moisture—whether from rain, dew, or sweat—is the enemy of grip. I keep a microfiber or disc‑specific towel, and sometimes a backup kitchen towel if I need it.

5. Water Bottle / Hydration

Hydration is non-negotiable, especially in hot or humid conditions. I carry a reusable water bottle (or bladder) so I can refill on the go. If possible, I also leave a backup in the car.

6. Pencil / Marker

Scorekeeping and marking are basic but essential. I carry a pencil (for scorecards) and a marker (to label new discs, write names, or sign a basket after an ace). Always better to have both so you’re never caught without.

7. Scorecards & Course Map / Notes

Having extra scorecards is smart—friends might forget theirs, or cards can get smudged. I also sometimes carry a folded map, course layout print, or hand‑written notes about tricky holes. Over time, I refer back to earlier rounds to guide my strategy.

8. Mini Clipboard or Clip Board

A small clipboard helps keep your card and pencil organized, even in wind or rain. When I don’t have a dedicated board, I clip cards to a firm plastic backing or even use a spare disc as a makeshift backing.

9. Compact First Aid Kit

No matter how cautious I am, scrapes, slips, blisters, or minor cuts happen. I pack a small kit with band‑aids, antiseptic wipes, blister pads, and a few adhesive bandages. I check it every few months to restock.

10. Mini / Mini Marker Disc

A mini marker is lightweight and multifunctional. Use it to mark your lie, block an opponent’s line, or as a fun collectible. I carry a couple—no harm if one gets lost in the underbrush.

You can check out a variety of mini marker discs at Altitude Disc Golf if you want to pick up a few.

11. Sunscreen / Lip Balm with SPF

Sunburn or lip burn are real game killers. I keep a small active‑sport sunscreen and SPF lip balm in my bag. Reapply mid-round if needed, especially on exposed courses.

12. Baseball / Small Weighted Ball

Odd as it sounds, a baseball or similar ball is perfect for knocking discs loose from branches. Instead of tossing rocks, I toss a ball straight at stuck plastic to nudge it free. It’s small, effective, and often forgotten—until you need it.

13. Chapstick / Lip Conditioner

Dry winds, cold weather, or strong sun can wreak havoc on your lips. Chapstick or lip balm (with or without SPF) is a small but morale-saving item I never leave behind.

How to Prioritize Your Bag Space

Not all bags have infinite room. Here’s how I decide what to load first:

  • Essential: water, snacks, a towel, shoes/stance gear, retriever (if relevant)
  • High value: first aid kit, bug spray, sunscreen
  • Nice to have: clipboard, extra scorecards, baseball, minis, chapstick

I also consider redundancy: if I know a local course has potable water or a shop nearby, I’ll carry less water. But I never skip hydration in unfamiliar settings.

Final Thoughts

Your discs and your arm are the stars, but your bag is your lifeline. When you’re prepared for little surprises—wet footing, scratched discs, missing gear—you can stay focused on every shot. Over time, you’ll dial in what works for *your* play style and courses. I hope this list helps you build a bag that handles all conditions, keeps you in the game, and lets you throw without worry.

Review This Disc

Posted on

Learn The X-Step NOW!

disc golf x-step No ratings yet.

Improving your backhand distance in disc golf isn’t just about arm speed. The real secret comes from using your lower body. With the right footwork, you can engage your hips and legs, generate more momentum, and add serious power to your throws. One of the most effective ways to do this is by learning the X-Step.

What Is the X-Step?

The X-Step is a controlled three-step run-up used on backhand drives. Instead of relying on a full sprint or a rushed approach, the X-Step lets you build power while staying balanced and accurate. It’s the foundation of most professional players’ driving form.

How the X-Step Works

  • For right-handed players: step first with your right foot, then bring your left foot behind your right (forming the “X”), and finish with another step on your right foot.
  • For left-handed players: reverse the sequence.

This sequence puts your body in a strong position for a full reach-back and a powerful release.

Step-by-Step Breakdown of the X-Step

1. Set Up and Aim

Line up your body so that your throwing shoulder points toward the target. Extend your arm with the disc to lock in your line. Remember, your “target” isn’t always the basket—it could be an aiming point for a hyzer, anhyzer, or line around an obstacle.

2. First Step with Your Dominant Foot

Take your first step with your throwing-side foot (right foot for right-handed players). Keep your upper body moving along a straight line toward your target while placing this step slightly forward of that line.

3. Cross Step with Your Non-Dominant Foot

Bring your non-dominant foot behind your lead foot, creating the “X” position. This is where your reach-back begins—pull the disc straight back while your head and shoulders turn away from the target.

4. Final Step with Your Dominant Foot

Plant your dominant foot firmly. Your reach-back should now be fully extended, ready to explode into the throw. Drive your elbow forward and pull the disc along a straight line toward your target as your hips and shoulders rotate.

5. Release and Follow Through

Let your momentum carry through the release. Your throwing arm should swing across your body, and your trailing leg should pivot around. This follow-through prevents injury and ensures that all of your generated force transfers into the disc.

Tips for Transitioning to the X-Step

If you’ve been throwing from a standstill, the X-Step may feel awkward at first. Here’s a simple way to build up:

  • Start with a one-step throw – Take a single lead step with your dominant foot and work on timing your reach-back and release.
  • Slow it down – Practice the X-Step at walking speed before adding speed. Balance and accuracy matter more than rushing.
  • Reset if needed – If you lose balance, stop and start over. Clean, consistent form builds muscle memory.

Still Struggling?

Form changes take time. If you’re still having trouble, check out this instructional video by Danny Lindahl of Dynamic Discs. His slow-motion breakdown makes it easy to see how each step works together.

Recommended Gear for Practicing the X-Step

When learning new footwork, it helps to practice with discs that are forgiving and easy to control:

A reliable midrange like Discraft Buzzz holds your release angle, making it great for form work.

Buzzz

Putters – Putters like the Innova Aviar are perfect for controlled drives when dialing in footwork.

Discmania Fairway Drivers – Stable, easy-to-throw drivers help you test the X-Step without overpowering your form.

Final Thoughts

The X-Step is one of the most important techniques in disc golf. It builds a strong foundation for distance, control, and consistency. Take your time, practice slowly, and you’ll notice your throws traveling farther with less effort.

If you’re just starting out, you may also enjoy our guide on the best discs for beginner disc golfers.

Review This Disc

Posted on

Skins Game: You Should Be Playing This Fun Disc Golf Variation

disc golf skins game No ratings yet.

Sometimes regular rounds of disc golf can start to feel repetitive. If your weekly group is looking for something new, a Skins Game is a fun variation that keeps everyone engaged. It’s especially great when you have a mix of skill levels and players who don’t mind putting a little money—or just points—on the line.

Why Calvin Heimburg will win a major this year (and Paul, Rick won't)

How to Play Skins in Disc Golf

In a Skins Game, every hole is worth a set value, called a “skin.” This value can be money, points, or any agreed-on reward. The player with the lowest score on a hole wins that skin.

  • If two or more players tie, the skin “pushes” to the next hole, adding onto its value.
  • If ties keep happening, the skins continue to stack until someone wins outright.
  • If the last hole ends in a tie, players usually move to a sudden-death playoff until the winner is decided.

The player who wins the most skins by the end of the round is the champion.

Beginner Tips for Skins

  • Start small: Play for nickels, dimes, or quarters per hole so the stakes stay fun and inviting.
  • Focus on holes, not rounds: Unlike stroke play, there’s no making up lost strokes later. Each hole is its own battle.
  • Pick up when tied: If a tie is guaranteed, there’s no need for everyone to finish the hole. This speeds up play.

Skins is one of those games that’s easy to learn but exciting enough to play over and over. That said, if you want even more variety, you can try another popular side game called Wolf.

How to Play Wolf

Wolf starts with the same basic structure as Skins: each hole has a set value, and ties push skins forward. But Wolf adds extra layers of strategy by rotating roles and allowing players to team up.

Basic Wolf Rules

  • Before the round, decide the player order. The first thrower on a hole is the “wolf.”
  • After driving, the wolf can choose to play solo (“lone wolf”) or pick another player as a partner.
  • If the wolf goes solo and wins, they get double the value of the skin. If they lose, the skin is divided among the other players.
  • If the wolf picks a partner, they play as a team against the rest of the group. The winning side splits the skin.
  • Once the wolf passes on a player, they can’t go back and select them later on that hole.

Teams play the hole using the best shot format, so it often comes down to smart teamwork and strategy.

Wolf Beginner Tips

  • Keep track of the throwing order with a scorecard—rotation is easy to forget mid-round.
  • If your drive is solid, going lone wolf can be worth the risk since skins double in value.
  • Don’t hesitate to play conservative if your drive isn’t strong. Picking a partner can keep you in the game.

Popular Wolf Variations

Different groups have their own twists on Wolf. Here are a few fun options:

  • Triple or quadruple the skin for lone wolf wins instead of doubling it.
  • Allow the wolf to wait until all drives are thrown before picking a partner.
  • Drop all skins if the final hole ends in a tie, instead of going to sudden death.

Final Thoughts

If you’re looking to mix up your regular rounds, give Skins or Wolf a try. Both games add strategy, variety, and a fresh challenge to casual play. Whether you’re throwing drivers off the tee or laying up with a putter, these formats make every throw matter.

Next time you meet up with your buddies for a weekly round, suggest trying one of these games. You might find they become your new go-to for keeping things fresh and competitive.

Review This Disc

Posted on

9 Disc Golf Practice Drills To Improve Your Putting

disc golf practice drills No ratings yet.

If you want to lower your scores in disc golf, there’s one skill that gives the biggest return on your practice time: putting. Strong putting saves strokes and builds confidence on the course.

The good news is that putting practice doesn’t require much space. With a few putters and a disc golf basket, you can work on your game in the backyard, garage, or even indoors. Here are nine proven practice drills to sharpen your putting.

Disc Golf Putting: Common Issues & How To Improve | Release Point - The UDisc Blog

1. Overload Drill

Start at a comfortable distance and putt twice. If you make both, step back and throw four putts. Keep stepping back and increasing the number of putts by two. If you miss, step forward one spot but still increase the number of putts.

Variation: Change the increase to one or three putts at each spot, or allow yourself to move back after making most of your putts instead of all.

2. Five’s Drill

Putt five times from one distance. If you make all five, step back. If you miss, step forward. Repeat from each new position.

Variation: Adjust the number of putts per position, anywhere from two to twenty. Five or ten is a good balance.

3. 50/50 Drill

Putt twice from your starting distance. If you make at least one, step back. If you miss both, stay put and repeat.

Variation: Try four or six putts at each distance, only moving back if you make half or more.

4. The Line Drill

Putt once from a starting point. If you make it, step back. If you miss, step forward.

Variation: Move back two steps instead of one, or stay in place until you hit the putt before moving forward.

5. Pure Random Drill

Pick a random spot around the basket and putt twice. If you make at least one, move to another random location.

Variation: Change your putting style at each location—spin, push, straddle, turbo, or whatever you want to practice.

6. Around the World Drill

Putt once, then step to the side and slightly back. Keep circling the basket in this pattern. If you miss, stay put until you make it.

Variation: Putt twice at each position. If you make both, step back and to the side. If you miss one, only move sideways. Miss both and move forward one step.

7. Push Your Luck Drill

Putt once from your starting spot. If you make it, step back. Keep moving back until you miss, then return to your starting distance.

Variation: Try two putts per spot, only moving back if you make both. If you miss any, restart.

8. Putt Horse Drill

Play a disc golf version of basketball’s HORSE. One player picks a spot and putts. If they make it, everyone else has to putt from the same spot. Miss and you get a letter. Spell out “HORSE” to be eliminated.

Variation: Use a shorter word like “PIG” for a quick game, or a longer word like “ELEPHANT” for a challenge. Add rules where everyone must use the same putting style.

9. The Obstacle Drill

Putt from behind an obstacle like a tree or bush. If you make at least one of your two putts, move farther from the obstacle and try again. If you miss both, stay at the same spot until you make one.

Variation: Practice two different shot angles from behind the obstacle, like straddling left and then right.

Final Thoughts

Practicing these drills regularly will build muscle memory, accuracy, and confidence inside the circle. If you don’t already have a basket, you can check out our practice basket selection. A reliable set of putters also makes a big difference—having multiples of the same mold lets you get more reps without chasing discs.

Whether you practice in your yard or living room, focused putting drills will translate directly to lower scores on the course.

Review This Disc

Posted on

Quick Guide : The Flex Shot

flex shot guide No ratings yet.

If you’re an intermediate or advanced disc golfer looking to expand your shot selection, learning the flex shot can make a big difference. It’s a versatile throw that helps with shaping lines and even adding distance when executed correctly. Beginners may want to wait before focusing on this shot, but it’s still useful to understand how it works.

What Is a Flex Shot?

The disc golf flex shot is thrown by releasing an overstable disc on an anhyzer angle. The disc turns out of your hand, then “flexes” back as its stability kicks in. For a right-handed backhand thrower, the disc will first drift right before working back left.

Some players call this the “anhyzer flex shot,” but most simply use “flex shot.”

How to Throw It

  • Choose an overstable driver or fairway.
  • Release on an anhyzer angle so the disc turns out of your hand before fighting back.
  • Keep the nose down to prevent stalling or early drops.
  • Adjust the height—higher throws allow more distance and fade, while lower throws give tighter lines.
  • Trust the disc’s stability to bring it back.

Tips for a Successful Flex Shot

  • Pick a disc with medium to high fade for a stronger finish. For example, the Infinite Discs Emperor or Innova Destroyer are common flex shot choices.
  • Generate plenty of snap and power so the disc carries before fading back.
  • Avoid too much anhyzer, which can cause cut rolls.
  • Devote field practice sessions specifically to dialing in this throw.

When to Use the Flex Shot

Shot Shaping

The flex shot is perfect when you need to bend around multiple obstacles—turning one way early, then fading back. Players who often face wooded fairways will benefit from having this shot in the bag.

Extra Distance

Adding a slight anhyzer release to an overstable driver can keep it in the air longer than a flat release. This gives you added carry before the disc’s fade brings it back.

Flex Shot vs. S-Shot

Many players confuse the flex shot with the S-shot, but there’s an important difference:

  • Flex Shot: Overstable disc released on an anhyzer angle. More advanced, consistent, and reliable once mastered.
  • S-Shot: Understable disc released flat. Easier for beginners, a simple way to add distance, but less predictable.

The two shots often look the same from above, both carving an “S” shape in the air, but the mechanics and discs used are different.

Final Thoughts

The flex shot isn’t the easiest throw to learn, but it’s worth the effort if you want to expand your game. It helps in wooded courses, provides new shot shapes, and can even add distance to your drives. Take the time to practice, and you’ll soon find yourself reaching for it with confidence.

Looking for discs to start practicing flex shots? Check out our selection of distance drivers and fairway drivers that can handle the stability required for this shot.

Review This Disc

Posted on

Disc Golf Putting Styles: Spin, Push, and More

disc golf putting No ratings yet.

Putting is one of the most important skills in disc golf — and often one of the most overlooked. While the target is close, there’s a lot more going on than it might seem. Wind, elevation, nerves, and your stance can all affect the result. The good news? There’s no single “correct” way to putt.

Whether you’re a new player looking for your first go-to putting style or a seasoned player wanting to add new tools for specific situations, this guide covers the most common disc golf putting styles — and when to use them.

Major Putting Styles in Disc Golf

There are two main styles most disc golfers use: the spin putt and the push putt. Many players fall into one camp or the other, but some blend the two into a hybrid style.

Spin Putt

The spin putt is like a mini throw — you apply wrist spin just like you would on a drive. The disc leaves your hand with speed and flies in a more direct, flat line to the basket.

Benefits:

  • More resistance to wind
  • Highly repeatable motion from 10 to 30+ feet
  • Good for beginners due to consistent mechanics

Drawbacks:

  • Faster putts can cause more spit-outs
  • Misses often carry farther past the basket

Push Putt

Push putting is more of a toss than a throw. It uses a slower, arcing flight path — think of it like shooting a free throw in basketball. The disc tends to float with less spin and more loft.

Benefits:

  • Highly accurate inside the circle
  • Similar motion to everyday tossing tasks
  • Soft landings on misses

Drawbacks:

  • More affected by wind
  • Requires more adjustment for different distances
  • Less effective outside of circle 1

Hybrid Putt (Spush)

Many players find a middle ground between spin and push putting — often called a “spush” putt. You’ll see a bent-waist stance like a push putt, but with added wrist spin for stability and glide. This hybrid approach can give you the best of both worlds.

Alternative Putting Styles

While spin and push putts are the most common, there are other styles that come in handy — especially when you’re stuck in tricky situations or putting from long distance.

Turbo Putt

The turbo putt is a specialty throw where the disc rests on your thumb with your fingers wrapped around the rim. You throw it overhead, like a football or baseball.

Why use it:

  • Great for getting over bushes or obstacles
  • Releases from a higher point

Keep in mind:

  • Harder to control, especially at distance
  • Not ideal as your main putting style

Jump Putt

Have You Ever Wanted To Learn To Jump Putt? – Sabattus Disc Golf, Inc.

The jump putt adds a forward jump to your putting motion to gain extra power. It’s only legal when you’re more than 10 meters (about 33 feet) from the basket.

Why use it:

  • Increases putting range
  • Gives your normal putt extra reach

Rules to remember:

  • You must release the disc before your plant foot leaves the ground
  • Using it inside 10 meters is a foot fault

Putting Stances: Straddle vs. Staggered

Besides the type of putt you use, your stance can also impact your accuracy and comfort on the green. There are two common setups:

Straddle Stance

Your feet are set shoulder-width apart, with equal weight on both. You draw the disc back between your legs and release it straight forward.

When to use it:

  • Helps get around trees or obstacles
  • Keeps your body centered and balanced

Staggered Stance

This is more like a traditional throw stance. Your feet are offset, one behind the other. You rock your weight from back to front as you release the disc.

Benefits:

  • Gives a natural forward motion
  • Helps generate power and maintain a clean line

Final Thoughts

One of the great things about disc golf is the freedom to find a style that works for you. There’s no single “correct” way to putt — just what works best for your form and confidence. If you’re just getting started, try out a few of the main putting styles and see what feels natural. And if you’ve been playing for a while, it’s worth practicing some alternative styles to add versatility when your usual putt won’t cut it.

Looking to upgrade your putters? Check out our full selection of putters.

Review This Disc

Posted on

20 Disc Golf Game Variations You Should Be Playing

Disc golf Variations banner No ratings yet.

If you play casual rounds at the same course often, things can start to feel repetitive. One of my favorite ways to keep it fresh is by switching up the rules. Whether you’re playing with a group of friends or trying to spice up league night, these disc golf game variations bring new challenges, laughs, and rivalries. Most of these aren’t PDGA-approved — but that’s kind of the point.

Competitive Game Variations

Bag Raid

Play standard stroke rules, but the winner of each hole gets to steal a disc from another player’s bag — or return one previously taken. Stolen discs stay out of play until they’re earned back. Great for chaotic energy.

Bingo Bango Bongo

Three points per hole: one for longest drive (Bingo), one for closest approach (Bango), and one for holing out first (Bongo). Players must throw in order from farthest to closest to keep it fair.

Match Play

Play head-to-head — each hole is worth one point. Win the hole, win the point. Ties get nothing. Most points at the end wins. This format works well for 1v1 or 2v2 matches.

Skins

Each hole is worth a “skin,” which can be a point, snack, or even a small cash prize. Win the hole outright to claim it — if there’s a tie, the skin rolls over to the next hole. Stakes add up fast.

Scratch Play

Strokes are replaced with points: Bogey = 0, Par = 1, Birdie = 2, Eagle = 5. But there’s a twist — two bogeys in a row wipes all your points. It’s high risk, high reward.

Shootout

After each hole, the player with the worst score is eliminated. Use closest to pin or longest putt for tiebreakers. Best with 4 or more players. The last player standing wins.

Fun & Casual Variations (Not Exactly PDGA Approved)

Barkie

Every tree hit earns a “barkie” point. Subtract your total barkies from your final score. Suddenly, that bad kick might be working in your favor.

Bizarro Golf

Assign a weird rule to each hole: throw with your off-hand, rollers only, forehands only, or swap bags with someone. Make up rules ahead of time or pick randomly each hole.

Drink Up

The worst score on each hole takes a drink. Add more for OBs, trees, or water hazards. Great for evening rounds — just play responsibly.

Sorry, Dude

Each player gets 2–3 “cancels.” At any time, call “Sorry, dude!” and force a re-throw. Use them wisely — timing makes all the difference.

Safari

Redesign the course as you go. The player with honors creates a new hole from any tee to any basket. Just be safe and watch for other players.

Ript Revenge

Ript Revenge is a card game that adds wild challenges to your round. Cards can force trick shots, bag swaps, or random restrictions. It’s a great way to make any round unpredictable.

Random Disc

All players throw one disc into a pile and draw blind. Whatever you draw is your disc for that hole. A fun way to challenge your shot shaping.

Throw ’Em All

You must throw every disc in your bag once before reusing any. After all are thrown, you “unlock” the bag. Some versions allow unlimited putter use — your call.

Game Variations Best for Doubles or Groups

Piggyback

After tee shots, players may choose to throw from another player’s lie. Each lie can only be used once per round. It’s all about timing and trust.

Nomination

Before each throw, nominate 2–3 discs from your bag. Your opponent chooses which one you must use. Adds strategy and plenty of playful sabotage.

Disc Steal

Everyone starts with the same number of discs. Win a hole, steal a disc. Lose all your discs and you’re out. Works great with smaller starter bags like those found in our starter sets.

Hate ’Em

Each player picks a few “hate” holes before the round. On those holes, you automatically record par — no matter what you shoot. It’s a great way to survive those frustrating layouts.

Worst Shot

Ideal for doubles. Both players throw, but you must play from the worst of the two lies. Works especially well on wooded courses. For balance, try alternating holes with Best Shot.

Give Your Casual Rounds a Boost

Whether you’re playing for bragging rights, a snack stash, or pure entertainment, these disc golf game variations can make your rounds way more memorable. Try one or two with your group and see which ones become regulars in your rotation.

Need a fresh bag or discs to share with friends? Check out our full selection of disc golf bags, or browse discs by brand:

Review This Disc

Posted on

How To Throw A Hyzer Flip

No ratings yet.

Learn How To Throw A Hyzer Flip! Check This Out!

So you’re new to disc golf and have heard of a shot called the hyzer flip but you aren’t sure what it is? Or maybe you have a good idea about what a hyzer flip is but you aren’t sure how to throw it? If you fit into one of these scenarios, you’ve come to the right place. In this article, we’re going to talk about how to throw a hyzer flip.

We’ll also go over some tips for improving the hyzer flip and how to select a disc for this shot. Hopefully, by the time you’ve read this article, you’ll have a great disc golf throw in your arsenal. Let’s get into it.

How To Throw A Hyzer Flip


Please note we’re supported by our readers. When you buy through our links we earn an affiliate commission. Thanks for your support!

What Is A Hyzer Flip?

The hyzer flip is a great way to get an understable disc to fly straight. It works by releasing an understable disc on a hyzer angle with a lot of force. When done right the disc will turn right (for a right-handed player) and flip to flat. The disc should continue flying parallel to the ground in a very straight flight path. It’s a great alternative to throwing a stable disc with a flat release and works well for low tunnel shots or other situations that require a straight flight path.

What Is Hyzer?

So the Hyzer part of the hyzer flip is the way the disc is released but what exactly does Hyzer mean? In disc golf, when we say, Hyzer, we mean releasing the disc on an angle with the side of the disc that is opposite your hand is tilted down. So for a hyzer release during a backhanded throw by a right-handed player the left side of the disc is tilted downward.  

What Is Understable?

The flip part of the hyzer flip refers to throwing an understable disc and getting it to flip over. You may have heard players talking about throwing a flippy disc. When they use this term they referring to an understable disc. Flippy meaning that the disc is easy to flip or turn over.

If you are unsure if a disc is understable or not, a great way to tell is by the turn rating. In the flight rating system, there are 4 numbers and 3rd number in the sequence is the turn rating. This number measures the tendency of the disc to turn left or right when leaving a players hand. A disc is considered understable if it has a turn rating between -1 and -4.  

Putting It All Together

So to throw a hyzer flip you’ll need to select an understable disc, usually a driver. You’ll use your normal driving motion but you’ll need to make sure you release the disc with a hyzer angle. The amount of hyzer you put on the disc will be a judgment call you’ll have to make and you’ll get better at making this call with practice.

You’ll want to make sure you release the disc with enough force to get it to hyzer up and flip to flat. You’ll also want to make sure you aren’t releasing the disc too high or with the noise up. When done correctly the disc should flip to flat and fly straight. You may also see the disc flip to flat, then turn over a little bit and come back. Think of a tighter S-cure.    

Hyzer Flip Tips

The Hyzer flip can be a tough shot to develop and be consistent with but it’s worth learning. There are a lot of moving parts and specific steps to get right in order to be successful. Use this tips to iron out your hyzer flip:

  • Use an understable disc
  • Release at a Hyzer Angle
  • Focus on releasing the disc with a forceful snap
  • Keep the nose down
  • Release the disc low

The Best Type Of Discs For Hyzer Flips

As we’ve already touched on, you’ll want to use an understable disc when attempting a hyzer flip. A driver is preferred but it’s also possible to hyzer flip a midrange or putter, it just has more force. A new disc that has a negative turn rating works great for a hyzer flip. You can also use an older beat-in disc that you know is flippy.

Check out this article I wrote on the best hyzer flip discs.

When To Use The Hyzer Flip

We’re already talked about using the hyzer flip for tunnel shots but this is a great shot to use in the woods or to hit a specific gap. The main thing you will need to think about when trying to make a judgment on if a hyzer flip will work for you is the distance it takes the disc to flip to flat. If you are staring down a tunnel or a close group of tree you’ll need to make sure you have enough distance for the disc to hyzer to flat before it would come in contact with an obstacle.

A situation you probably wouldn’t want to use a Hyzer flip is an open field. You will probably be better off not putting some much snap on an understable disc to get it hyzer flat and use another shot where less force is required.

The Hyzer Flip In Action

Check out this video to see disc golf pro, Eric Oakley perform a hyzer flip. He gives his own tips and disc recommendations.

Image Credit Flickr Creative Commons – Bureau of Land Management Oregon and Washington

Review This Disc

Posted on

Disc Golf Tips To Elevate Your Game

No ratings yet.

Unleashing Your Disc Golf Potential: Expert Tips To Elevate Your Game

Disc golf has gained tremendous popularity as a sport that combines the principles of golf with the excitement of frisbee throwing. Whether you’re a beginner looking to improve or an intermediate player seeking to elevate your game, there are numerous ways to enhance your skills and take your disc golf game to the next level. In this comprehensive article, we’ll provide you with detailed explanations and engaging disc golf tips to help you improve your performance on the disc golf course.

Mastering The Basics

Disc Selection:

disc golf discs

1. Understanding Disc Types: When it comes to disc golf, understanding the different types of discs is crucial for honing your skills. Discs are typically categorized into four main types: distance drivers, fairway drivers, midranges, and putters. Each type serves a specific purpose on the course.

a. Distance drivers are designed for maximum distance. They have a sharp edge and are typically more aerodynamic, allowing them to achieve incredible distance but requiring a higher level of power and technique to control.

b. Fairway drivers are versatile discs that offer a balance between distance and control. They are often used for shots that require both accuracy and distance, such as navigating tight fairways or executing controlled drives.

c. Midranges are designed for a variety of shots, including approach shots and shorter drives. They offer a good balance of control and distance, making them essential for precise throws where accuracy is paramount.

d. Putters are the discs used for short-range shots, primarily for putting into the basket. They have a rounded edge and a slower speed, providing excellent control and accuracy for accurate placement on the green.

Understanding the characteristics and flight patterns of each disc type is essential for choosing the right disc for specific throws and achieving optimal results on the course. As you become more familiar with the nuances of each disc type, you can leverage their unique qualities to elevate your disc golf game to new heights.

2. Choosing The Right Disc For Different Throws: When it comes to disc golf, selecting the right disc for each throw is paramount to success on the course. A disc’s stability, speed, and weight are key factors to consider when making your choice. Understanding the flight characteristics of discs will enable you to make informed decisions and optimize your performance.

a. Stability: Discs can be categorized as either overstable, understable, or neutral. Stability refers to a disc’s tendency to curve during flight based on its design and weight distribution. This characteristic directly affects how the disc will behave in the air.

  • Overstable discs have a tendency to resist turning and maintain a straighter flight path. They are ideal for shots that require consistency and predictability, especially in windy conditions or when throwing against a headwind.
  • Understable discs, on the other hand, are more prone to turning to the right (for right-handed backhand throws). They offer increased distance potential but require careful control and technique. They are valuable for executing shots that require a right-to-left (for right-handed players) or an S-curve flight path.
  • Neutral discs fall in between the extremes of overstable and understable. They provide a balanced flight path and are suitable for a variety of shots, offering a blend of control and distance.

b. Speed: The speed rating of a disc indicates the power required to achieve its optimal flight. It ranges from 1 (slowest) to 14 (fastest). Faster discs require more arm speed and power to achieve maximum distance, while slower discs are easier to control and ideal for shorter throws.

c. Weight: Discs come in various weights, typically ranging from 150 grams to 175 grams. Lighter discs tend to offer increased distance potential and are easier to throw for beginners or players with less arm strength. Heavier discs provide more stability and are advantageous in windy conditions or when throwing into headwinds.

To choose the right disc for a specific shot, consider the desired flight path, distance required, wind conditions, and your own throwing power and technique. Experimenting with different discs and understanding how they perform in various situations will help you identify the discs that best suit your playing style.

Additionally, it is worth noting that disc manufacturers often provide flight charts or descriptions that offer insights into a disc’s flight characteristics. These resources can serve as valuable references when making disc selections.

By understanding the stability, speed, and weight of discs, you can make informed decisions that align with your throwing style and desired shot outcomes. This knowledge will empower you to choose the perfect disc for each throw, enhancing your control, accuracy, and overall enjoyment of the game..

Proper Grip & Stance:

Disc Golf Grip (Backhand)

1. Power Grip vs. Fan Grip: The way you grip the disc can greatly impact your throwing technique and overall performance in disc golf. Two commonly used grips are the power grip and the fan grip, each offering distinct advantages for different types of throws.

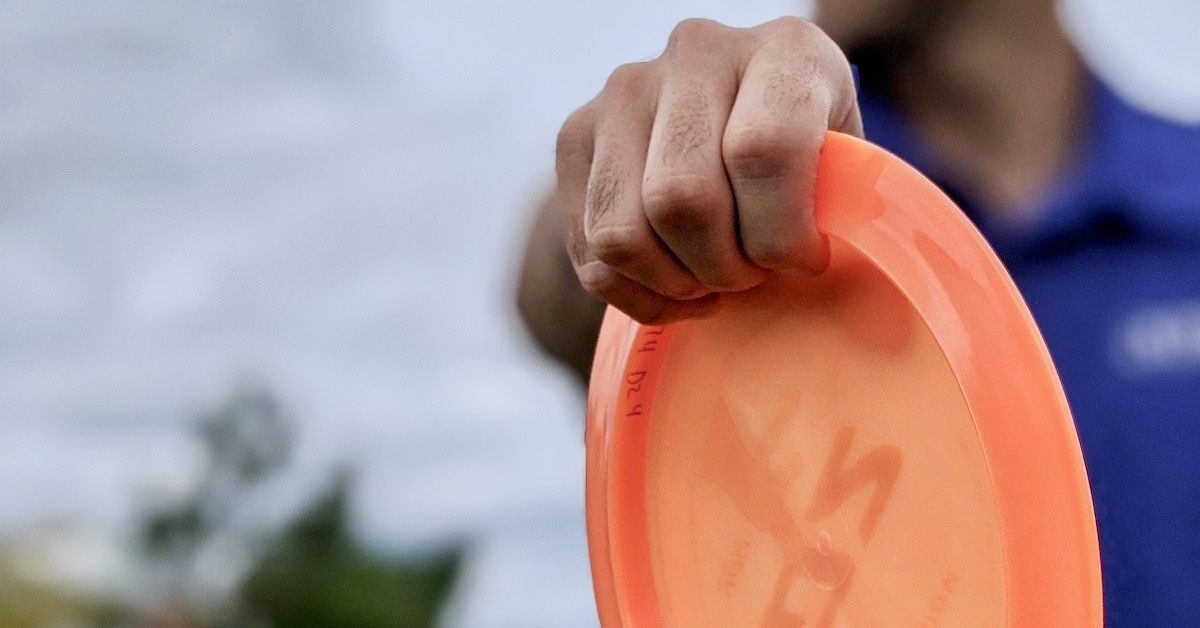
a. Power Grip: The power grip is widely used for long-distance drives and powerful throws. It maximizes control and generates more power by utilizing a firm grip on the disc.

  • How To Use The Power Grip: To execute the power grip, place the disc deep in the hand, with the rim against the base of your fingers. Wrap your fingers tightly around the rim, ensuring a secure hold. The thumb should be pressed against the flight plate, providing additional stability and control.
  • Advantages Of The Power Grip: The power grip allows for a more efficient transfer of power from your body to the disc, enabling you to generate maximum distance. It provides a solid connection between your hand and the disc, allowing for a strong and controlled release. The grip’s firmness enhances stability during the throwing motion, minimizing potential wobble or flutter in the disc’s flight.
  • Considerations With The Power Grip: While the power grip offers increased power and distance potential, it may sacrifice some finesse and touch. It requires a higher level of grip strength and may be more challenging for players with smaller hands or limited finger dexterity. It is also important to practice maintaining a balanced grip pressure to avoid gripping the disc too tightly, which can affect your release and accuracy.

b. Fan Grip: The fan grip is often preferred for shorter throws that require accuracy and touch. It allows for a looser hold on the disc, promoting increased control and finesse.

  • How To Use The Fan Grip: To execute the fan grip, hold the disc with the rim against the pads of your fingers. Spread your fingers out, resembling a fan, and allow the thumb to rest lightly on the flight plate. The grip should be relaxed and comfortable, without excessive pressure on the disc.
  • Advantages Of The Fan Grip: The fan grip offers enhanced touch and control, making it ideal for approach shots, mid-range throws, and precision shots around obstacles. The looser grip allows for increased wrist and finger movement, facilitating delicate releases and subtle adjustments to the disc’s flight path.
  • Considerations With The Fan Grip: While the fan grip excels in accuracy and touch, it may sacrifice some power and distance potential. The looser grip may require additional focus on maintaining a clean release and avoiding grip slips during the throwing motion. It is crucial to find the right balance between a relaxed grip and maintaining enough control to prevent the disc from slipping or turning unexpectedly.

Understanding the strengths and weaknesses of both the power grip and fan grip empowers you to adapt your throwing technique to different situations on the course. Experiment with both grips during practice sessions to determine which one feels most comfortable and effective for various throws. Remember, proper grip technique, regardless of the chosen grip, is essential for consistent and controlled disc releases.

2. Stance & Body Position: The way you position your body and adopt a proper stance in disc golf can significantly impact your throwing power, accuracy, and overall control. Finding the right balance between generating power and maintaining control is crucial for consistent and accurate throws.

a. Stance: The stance refers to how you position your feet and body in preparation for a throw. There are a few common stances used in disc golf:

  • Backhand Stance: In the backhand stance, your throwing arm is extended across your body, and the disc is held with the back of your hand facing the target. Your non-throwing arm provides balance and stability while gripping the disc.
  • Forehand Stance (Or Sidearm): The forehand stance involves positioning your non-throwing arm across your body while holding the disc with the front of your hand facing the target. Your throwing arm swings across your body during the throw.
  • Hybrid Stance: The hybrid stance combines elements of both the backhand and forehand stances. It allows you to utilize the strengths of each technique and adapt to different throwing situations.

b. Body Position: In addition to the stance, your overall body position plays a vital role in generating power and maintaining control.

backhand

  • Balance: Ensure that your weight is evenly distributed between your feet, maintaining a stable base throughout the throwing motion. Proper balance enhances your control and stability during the throw.
  • Alignment: Face the target directly, aligning your body and feet in the direction you want the disc to go. This alignment promotes accuracy and minimizes unnecessary body movement during the throw.
  • Posture: Maintain a relaxed yet athletic posture with a slight bend in your knees and a straight back. This posture allows for better weight transfer and helps generate power from your legs and core.

c. Weight Shift & Follow-Through: Proper weight shift and follow-through are essential for maximizing power and maintaining control during the throw.

  • Weight Shift: As you initiate the throwing motion, transfer your weight from your back foot to your front foot. This weight transfer generates power and momentum, adding distance and accuracy to your throw.
  • Follow-Through: Complete the throwing motion with a smooth and controlled follow-through. Allow your arm to extend fully, and let your body naturally rotate towards the target. A full follow-through helps maintain accuracy and ensures that your energy is properly transferred into the disc.

By focusing on your stance, body position, weight shift, and follow-through, you can optimize your throwing technique in disc golf. Practice these aspects during training sessions to develop muscle memory and improve your overall throwing consistency. Remember, finding a comfortable and repeatable stance and body position that works best for you is key to achieving a balance between power, control, and accuracy in your throws.

Essential Throwing Techniques

Backhand Throw:

Backhand Throw

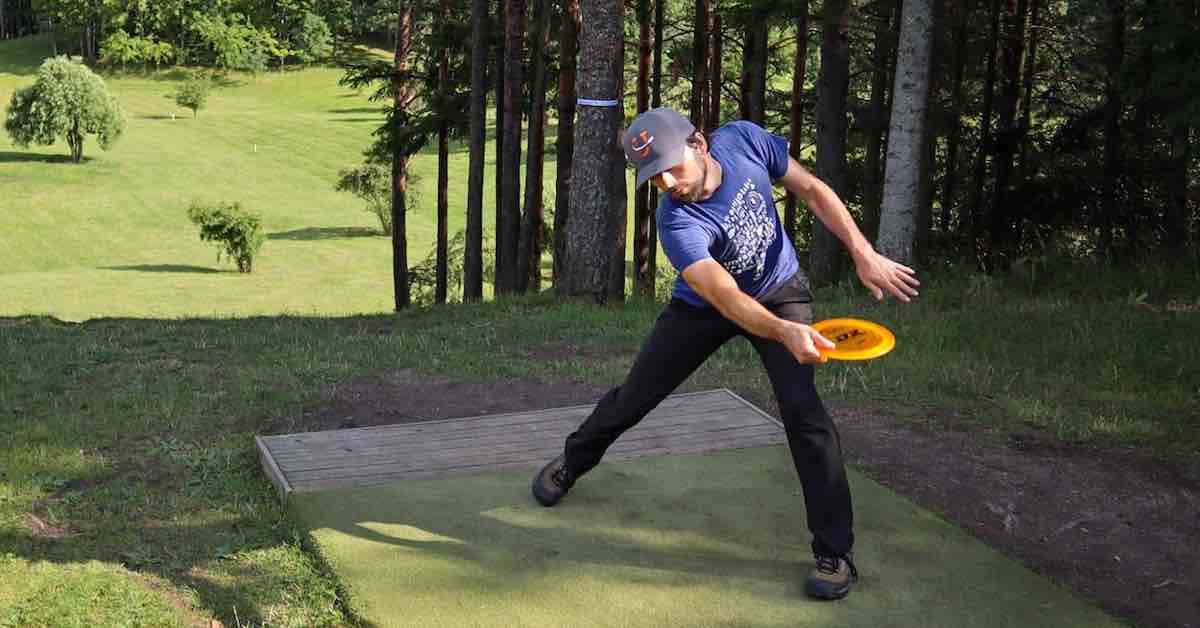
  1. Body Mechanics: Proper weight transfer, arm motion, and follow-through are crucial for a successful backhand throw. Understanding the mechanics behind these movements will help you generate power and accuracy.
  2. Release Point: The release point is the moment when you let go of the disc. Timing and accuracy at the release point significantly impact the flight path of your throw. Mastering this aspect will enable you to achieve consistent results.

Forehand (Sidearm) Throw:

Forehand (Sidearm) Throw

  1. Grip & Arm Position: The grip and arm position are essential for executing a successful forehand throw. Proper finger placement and wrist action generate power and spin, allowing you to control the flight path of the disc.
  2. Snap & Release: The snap of the wrist and the release of the disc play a critical role in maximizing power and accuracy in a forehand throw. Understanding the mechanics behind the snap and release will help you improve your throws.

Effective Putting Strategies

Choosing The Right Putter:

  1. Putt & Approach Discs: Putters specifically designed for putting and approach shots offer varying levels of stability and glide. Understanding the characteristics of different putters will enable you to select the disc that suits your throwing style.
  2. Comfort & Confidence: Finding a putter that feels comfortable in your hand and instills confidence is vital for consistent and successful putting. Experimenting with different putters will help you identify the one that best suits your preferences.

Developing A Consistent Putting Routine:

  1. Stance & Alignment: Establishing a consistent stance and aligning yourself with the target are essential for accurate putting. Proper foot placement and focus on the target will improve your putting consistency.
  2. Grip & Release: A smooth and controlled grip, along with a clean release, contribute to consistent and accurate putting. Practicing these aspects will help you refine your putting technique.

Game Management & Strategy

Course Familiarization:

Disc Golf Course

  1. Scouting The Course: Understanding the terrain, layout, and potential obstacles on a disc golf course will help you plan your shots effectively. Take the time to analyze the course before you start playing.
  2. Pre-Shot Visualization: Visualizing your shots in advance allows you to strategize and plan for optimal shot placement. This mental preparation will help you navigate the course more efficiently.

Shot Selection & Shot Shaping:

  1. Hyzer, Anhyzer, & Straight Throws: Familiarize yourself with different throwing techniques to shape your shots. Hyzer throws curve left (for right-handed players), anhyzer throws curve right, and straight throws maintain a consistent flight path. Being able to execute these different throws will expand your shot selection and help you navigate obstacles effectively.
  2. Using Different Discs For Various Shots: Each disc has unique flight characteristics. Utilize different discs for specific shots to maximize control, accuracy, and distance.

Mental Approach & Mindset

Focus & Concentration:

  1. Eliminating Distractions: Disc golf requires focus and concentration. Minimize distractions and find your rhythm on the course to maintain consistent performance.
  2. Staying Present: Let go of past mistakes and future worries. Focus on the current shot and give it your full attention. Being present in the moment will help you perform at your best.

Handling Pressure:

  1. Breathing Techniques: Deep, controlled breathing helps calm nerves and maintain composure during high-pressure situations. Incorporate breathing exercises into your routine to manage pressure effectively.
  2. Positive Self-Talk: Develop a positive internal dialogue to build confidence and resilience. Encourage yourself and maintain a positive mindset, even in challenging situations.

Training & Practice Strategies

Field Work:

  1. Distance & Accuracy Drills: Dedicate time to practicing throws in an open space, focusing on both distance and accuracy. Work on different throwing techniques to improve your overall performance.
  2. Shot Repetition: Repeat specific throws to develop muscle memory and consistency. Consistent practice will help you execute shots with confidence on the course.

Putting Practice:

how to putt

  1. Short & Long Putts: Practice putting from various distances to improve your accuracy and touch. Focus on developing a consistent putting stroke for both short and long putts.
  2. Mock Rounds: Simulate game scenarios during practice by imagining specific hole layouts and shot requirements. This will help you prepare mentally for real-game situations.

Conclusion

By implementing the disc golf tips and techniques outlined in this article, you can enhance your skills, boost your confidence, and take your game to the next level. Remember, consistent practice and a positive mindset are essential for improving your performance on the disc golf course. Embrace the joy of disc golf, enjoy the journey of honing your skills, and let those discs fly with precision and finesse!


Review This Disc

Posted on

The Dos & Don’ts On The Disc Golf Course

No ratings yet.

Introduction

Disc golf is a thrilling and engaging sport that combines elements of traditional golf with the fun and excitement of throwing flying discs. Like any sport, disc golf has its own set of rules and etiquette that players must adhere to while on the course. Understanding and following the dos and don’ts of disc golf course etiquette not only enhances your overall experience but also fosters a positive and respectful environment for all players. In this comprehensive guide, we will explore the essential guidelines and unwritten rules to help you navigate the disc golf course with confidence, courtesy, and professionalism.

I. Respect For The Course & Equipment

  1. Keep The Course Clean: Disc golf courses are shared spaces, and it is crucial to maintain their cleanliness. Dispose of trash and litter in designated bins or carry a small bag to collect any waste encountered along the way. Treat the course with respect, ensuring it remains an enjoyable environment for all players.
  2. Preserve The Course: Avoid damaging or vandalizing the course in any way. Be mindful of where you step, avoiding tees and fairways when not playing. Respect the vegetation and wildlife surrounding the course, ensuring they are not disturbed or harmed.
  3. Treat Equipment With Care: Show respect for the discs, baskets, and other equipment. Refrain from throwing discs at or hanging on the baskets when not playing. Handle the discs with care to prevent unnecessary damage, ensuring they remain in good condition for others to enjoy.

II. Etiquette Towards Fellow Players

disc golf course etiquette

  1. Observe Proper Throwing Order: Respect the established throwing order or let faster groups play through. This ensures a fair and organized flow of play. Allow players who have completed a hole to move on to the next tee before starting your throw.
  2. Maintain Silence During Throws: Keep noise levels to a minimum while others are throwing. Unnecessary distractions can negatively impact their focus and performance. By maintaining silence, you create a conducive atmosphere for concentration and accuracy.
  3. Yelling “Fore!”: When a disc is heading towards another player or group, promptly yell “Fore!” to alert them of the potential danger. This simple act can prevent accidents and ensure everyone’s safety on the course.
  4. Wait For Your Turn: Avoid throwing simultaneously with other players on the same hole. Wait for them to complete their throws before taking yours, maintaining a safe distance from the throwing area. This courtesy allows each player to focus on their shot without unnecessary interference.
  5. Offer Assistance & Encouragement: If a player is searching for a lost disc or experiencing difficulties, offer assistance or words of encouragement. This supportive attitude fosters camaraderie and a positive atmosphere on the course, creating a sense of community among disc golfers.

III. Navigating Challenging Situations

  1. Respect Others’ Personal Space: Maintain a reasonable distance from other players when they are preparing or throwing their discs. Give them the privacy and focus they need to execute their shots effectively. By respecting personal space, you demonstrate consideration for others’ concentration and mental preparation.
  2. Pace Of Play: Play at a reasonable pace to ensure an enjoyable experience for everyone. Be mindful of the time taken between throws and complete the round within a reasonable timeframe. Avoid unnecessary delays, but also allow ample time for strategic decisions and shot preparations.
  3. Lost Discs: If you lose a disc, spend a reasonable amount of time searching for it. However, if your search proves unsuccessful, allow the following groups to play through to avoid holding up the game unnecessarily. Respect the flow of play and be mindful of others’ time on the course.
  4. Interrupting Play: If you need to cross a fairway or walk through a group playing, do so quickly and quietly, without disrupting their concentration. Wait for an appropriate moment to pass through, ensuring minimal disruption to ongoing play.
  5. Resolving Conflicts: In the event of disagreements or conflicts, remain calm and respectful when discussing the issue with fellow players. Engage in open communication, seeking to understand each other’s perspectives. Strive for a resolution that maintains the integrity of the game and ensures a positive experience for everyone involved.

IV. Safety Precautions On The Disc Golf Course

  1. Be Aware Of Your Surroundings: Always be mindful of other players, spectators, and potential hazards on the course. Look out for pedestrians, wildlife, and other obstacles that may pose a safety risk. Avoid throwing when there is a risk of hitting someone or something unintentionally.
  2. Watch For Disc Flight Paths: Pay attention to the flight paths of your discs and those of other players. Ensure that your throw does not intersect with another player’s path, reducing the risk of collision and injury. Stay alert and adjust your shot if necessary to maintain a safe distance.
  3. Follow Local Course Rules: Familiarize yourself with the specific rules and guidelines of the disc golf course you are playing on. Some courses may have unique safety measures or restrictions in place, such as mandatories or out-of-bounds areas. Adhering to these rules promotes safety and fairness for all.

V. Proper Communication & Etiquette During Play

  1. Communicate With Playing Partners: Maintain clear and open communication with your playing partners throughout the round. Discuss strategy, share information about the course, and inform each other of any potential hazards or obstacles. Effective communication helps create a cohesive and coordinated team dynamic.
  2. Offer Congratulatory & Respectful Gestures: Acknowledge and congratulate fellow players on their successful shots or accomplishments during the round. A simple high-five or a friendly nod can go a long way in fostering a positive and supportive atmosphere on the course. Likewise, be gracious in accepting compliments and avoid boastful behavior.
  3. Mind Your Language & Behavior: Keep your language and behavior in check during play. Avoid using offensive or derogatory language and maintain a respectful attitude towards others. Remember that disc golf is a family-friendly sport, and your conduct should reflect that.

VI. Taking Care Of The Course & Community

  1. Volunteer For Course Maintenance: Take an active role in maintaining and improving the disc golf course. Participate in organized clean-up days, help repair course features, or contribute to fundraising efforts for course upgrades. Giving back to the community ensures that the course remains enjoyable for future players.
  2. Educate New Players: If you are an experienced disc golfer, take the opportunity to educate and mentor newcomers to the sport. Share the rules, etiquette, and best practices with them, helping them become responsible and respectful players. By fostering a welcoming and inclusive environment, you contribute to the growth of the disc golf community.
  3. Support Local Disc Golf Organizations: Get involved with local disc golf organizations and clubs. Attend events, tournaments, and fundraisers to show your support for the community. By actively participating, you help create a vibrant and thriving disc golf scene in your area.

Conclusion

In conclusion, mastering the dos and don’ts of disc golf course etiquette across these six key areas is essential for a rewarding and enjoyable experience on the course. Respect for the course and equipment sets the foundation for preserving the natural environment and ensuring a clean and pristine playing space. Etiquette towards fellow players fosters a positive and harmonious atmosphere, where respect, patience, and support are valued. Navigating challenging situations with grace and consideration allows for smooth gameplay and conflict resolution. Prioritizing safety precautions ensures the well-being of all players and minimizes the risk of accidents. Proper communication and etiquette during play enhance teamwork and camaraderie, elevating the overall experience for everyone involved. Finally, taking care of the course and community through volunteering, education, and support contributes to the growth and sustainability of the disc golf community. By embracing these principles and incorporating them into our play, we can create a thriving and inclusive disc golf culture that welcomes players of all levels while fostering a deep appreciation for the game, the environment, and the people who share our passion. So, step onto the course with confidence, demonstrate respect, and savor the thrill of disc golf while embodying the spirit of good sportsmanship and stewardship.


Review This Disc